Quantcast
Channel: Carbon Copy Cloner | Bombich Software - Advanced Topics
Viewing all 257 articles
Browse latest View live

Working with FileVault Encryption

$
0
0
Product: 
ccc5

CCC is fully qualified for use with FileVault-protected volumes (HFS+ and APFS). CCC offers some advice around enabling encryption in the Disk Center.

Enabling encryption on a volume that contains (or will contain) an installation of macOS

If your goal is to create a bootable, encrypted backup, use the following procedure:

  1. Follow CCC's documentation to properly format the destination volume. Do not format the volume as encrypted. Choose APFS if your Mac is a T2 Mac (e.g. iMacPro, any new Mac produced in late 2018).
  2. Use CCC to back up your startup disk to the unencrypted destination volume.
  3. Click on the destination volume in CCC's Disk Center, then click the Recovery HD button to create a Recovery HD volume. Note: You must be logged in to an administrator account to perform this step. [This step is unnecessary if your destination is an APFS-formatted volume]
  4. Open the Startup Disk preference pane and restart your Mac from backup volume.
  5. Enable FileVault encryption in the Security & Privacy preference pane of the System Preferences application.
  6. Reboot your Mac (it will reboot from the backup volume).
  7. Open the Startup Disk preference pane and restart your Mac from your production startup volume.
  8. Configure CCC for regular backups to your encrypted backup volume.

Note: You do not have to wait for the conversion process to complete before using the backup disk. Additionally, you do not have to remain booted from the backup disk for the conversion process to complete. You can simply enable FileVault encryption, then immediately reboot from your primary startup disk and the conversion process will carry on in the background. Encryption will continue as long as the backup disk is attached. macOS doesn't offer a convenient method to see conversion progress, but you can type diskutil apfs list (or diskutil cs list if the applicable volume is HFS+ formatted) in the Terminal application to see conversion progress. Some users have found that conversion may not resume until you log in to an admin account while booted from your production startup volume, so try that if conversion appears to be stalled.

What if I don't want my personal data to ever be on the destination in unencrypted form?

Enabling FileVault on the destination means that the volume starts out unencrypted, and then over the course of several hours the data is encrypted in place. If the encryption conversion process completes successfully, then for most intents and purposes, no trace of the unencrypted data will be left on that disk. There are some caveats however. If your backup volume is an SSD, and if you delete files from the SSD prior to enabling encryption, then the SSD may automatically move the not-yet-encrypted underlying blocks out of rotation (for wear leveling), and those data could be recoverable by experts. Likewise, if the conversion process fails for any reason, then the data on that disk is potentially recoverable. If either of these scenarios is not acceptable, then we recommend that you exclude any sensitive data from the initial backup task. Don't exclude your whole home folder — you must include at least one folder from your home directory so that you can log in to that account on the backup. After you have booted from the backup volume and enabled FileVault, you can then reboot from the production startup disk, remove the exclusions from your backup task, then run the backup task again to copy the remainder of your data. Any data that is copied to a volume that is in the midst of encryption conversion will be encrypted immediately.

Enabling encryption on a volume that will not contain an installation of macOS

If your backup volume won't be a bootable backup of macOS, simply right-click on that volume in the Finder and choose the option to encrypt the volume. If your Mac is running macOS High Sierra or later, please note that macOS will convert an HFS+ formatted volume to APFS when you enable encryption in this manner.

Finder option

Related Documentation


Backing up to a disk image

$
0
0
Product: 
ccc5

Disk images are not bootable backups. To create a bootable backup, you must back up to a hard drive that is attached directly to your Mac. We recommend that you only use a disk image if you are backing up to a network volume, and we recommend using locally-attached storage for your primary backups.

A disk image is a single file residing on your hard drive that contains the entire contents of another hard drive (except for the free space). When you want to access the contents of that filesystem, you double-click on the disk image to mount the disk image as if it were an external drive attached to the machine. Carbon Copy Cloner leverages disk images to provide you the flexibility of storing several complete backups on a single shared external hard drive. Disk images also improve the performance of backing up to network attached storage (NAS) devices, such as the Airport Extreme Base Station and Time Capsule.

To back up to a new disk image:

  1. Choose your source volume from the Source selector
  2. Choose New disk image... from the Destination selector
  3. Provide a name and choose a location to save your disk image
  4. If you plan to back up to this disk image again in the future, set the image format to one of the read/write formats. If you want a read-only disk image for archival purposes, set the image format to one of the read-only formats.

To back up to an existing disk image, select Choose disk image... from the Destination selector and locate your disk image.

Read/write "sparseimage" disk images

A sparseimage disk image is a type of read/write disk image that grows as you copy files to it. In general, sparse disk images only consume as much space as the files they contain consume on disk, making this an ideal format for storing backups. Use of this older disk image format is only recommended when backing up to non-AFP network volumes on an OS older than macOS Sierra. Please note that sparseimage files are monolithic and potentially very large files. If the underlying filesystem has a 2TB file size limit and the sparseimage file reaches that limit, the sparseimage file cannot be grown. In most of these cases the sparseimage file becomes corrupted when the underlying filesystem limit is reached, so we don't recommend this disk image format for large data sets.

Read/write "sparsebundle" disk images

A sparse bundle disk image is similar to a sparseimage insofar as it grows as you add data to it, but it retains its data in many smaller files inside of a bundle rather than inside a single file. We recommend this disk image format for most scenarios.

Running out of space on a sparseimage or sparsebundle disk image

CCC reported that the destination is full, but the underlying disk has plenty of free space. CCC initially sets the capacity of your disk image to the amount of free space on the underlying disk. If you have freed up some space on that disk since you created the disk image, you can manually expand the capacity of the destination disk image in Disk Utility. Choose Resize... from the Images menu in Disk Utility, select your destination disk image, then expand it as desired. We recommend that you do not expand the disk image such that it is larger than the capacity of the underlying disk.

The disk image file is larger than the amount of data it contains, why? Sparseimage and sparsebundle disk images grow as you add data to them. They do not, however, automatically shrink when files are deleted from them. As a result, the amount of disk space that the disk image file consumes will not necessarily reflect the amount of data that they consume. To reclaim disk space that is occupied by the free space on your sparse disk image, CCC will compact the disk image before attempting to mount it if the free space on the underlying volume is less than 25GB, or is less than 15% of the total disk capacity. In most cases, you do not need to compact the disk image yourself, but this functionality is documented here so you'll understand why you might see CCC spending time "Compacting the destination disk image" at the beginning of a backup task.

If you would like to compact a disk image manually, drop the disk image file onto this application: Compact Sparse disk images. Be sure to unmount the disk image volume if it is already mounted. Also, note that the compacting process can take a while (e.g. an hour for a 100GB disk image on a locally-attached volume). Finally, be sure that your system is running on AC power. The system utility that compacts the disk image will refuse to run while the system (e.g. a laptop) is running on battery power.

Read-only disk images

Read-only disk images cannot be modified without invalidating the built-in checksum, therefore they are a good container for storing archived material. Compression rates vary on the content of your source, but you can typically expect to reduce the size of your disk image by about half when using compression. There is a subtle behavior that you should take note of when considering this option as a space-saving measure: CCC will first create a read/write disk image, copy the selected items to it, then convert the disk image to read-only compressed. In this case, you will actually need twice the space on your destination as the items to be copied consume on the source.

Encrypting disk images

If any of the data that you are backing up is sensitive, and if your backup device may be in an insecure location, encrypted disk images can improve the security of your backup. CCC offers 128 bit and 256 bit AES encryption to encrypt disk images. To create an encrypted disk image, select one of the encryption levels from the Encryption menu. After you click on the OK button, you will be prompted to specify a passphrase for the new disk image, and CCC will give you an opportunity to save the passphrase in your own keychain. CCC will also store the passphrase in a private keychain so the disk image can be mounted automatically during scheduled backup tasks.

Note: If you create a read-only, encrypted disk image, the intermediate disk image that CCC creates is NOT encrypted. This intermediate disk image file is deleted once the final, read-only, encrypted disk image has been created, but it is not shredded. Take this into consideration when choosing your destination media. If the destination may be placed in an insecure location, use Disk Utility to securely erase free space on the underlying destination volume after you have created your encrypted disk image archive.

Running a backup task whose destination is a disk image on the startup disk

If you specify a disk image that resides on your startup disk as the destination to a scheduled task, CCC will impose some more conservative requirements on this task. To proceed with this configuration, one of the following requirements must be met:

  • The amount of free space on the startup disk is at least 1GB larger than the amount of consumed space on the source volume.
  • The disk image won't grow, e.g. it is a .dmg file, not a sparseimage or sparsebundle disk image.

These requirements avoid a scenario in which the startup disk runs out of free space, causing instability on macOS. If you cannot accommodate the free space requirement, we recommend that you create a .dmg disk image in Disk Utility (choose File > New... > Blank Disk image, set the image format to read/write disk image). Disk Utility will pre-allocate exactly as much space as you request, and CCC will gladly use this disk image without fear of filling up the startup disk.

Sparsebundle disk images are not supported on some filesystems

If your Mac is running an OS older than macOS Sierra, CCC will refuse to save or mount a sparse bundle disk image if the underlying filesystem that the disk image file resides upon does not support the F_FULLFSYNC file control. Most filesystems support this file control, but the SMB file sharing protocol does not. Most people that encounter issues with creating a sparsebundle disk image on a network volume are encountering issues because the network volume is mounted via SMB.

Starting in Mavericks, Apple's preferred file sharing service is SMB. As a result, if you attempt to connect to a network volume, Finder will use SMB to establish that connection unless you explicitly specify AFP as the protocol to use. In this configuration, a sparse bundle disk image will not work, and CCC will issue an error. To avoid this error, connect to the network volume explicitly using AFP:

  1. Eject the network volume if it is currently mounted
  2. Choose Connect to server from the Finder's Go menu
  3. Type in "afp://yourserver.local" (changing the hostname, of course), then click the Connect button and mount the network volume
  4. Go back to CCC and choose Choose disk image... from the Destination selector, then select the sparsebundle disk image on your network volume

Why can't I use a sparsebundle disk image on a filesystem that does not support the F_FULLFSYNC file control?

When your computer writes a file out to the hard drive, the data usually goes to a "write buffer"— a small portion of RAM that is installed on the circuit board of the hard drive. By accumulating smaller write operations onto this RAM chip, the hard drive can increase overall write performance by writing large blocks of cached data to the physical media all at once. While this write buffer improves performance, it also carries a risk. If the power fails or the disk's connection to the computer is suddenly broken between the time that data was written to the buffer and when the buffer is flushed to the disk, your filesystem will have an inconsistency. Filesystem journaling typically mitigates this risk, however it doesn't offer enough protection for Apple's sparsebundle disk image type.

In Mac OS 10.5, Apple implemented the F_FULLFSYNC file control for network servers and clients. The F_FULLFSYNC file control is a command that is sent to the hard drive after some (or all) write operations that tells the disk to immediately flush its cache to permanent storage. To provide better protection for data on sparsebundle disk images, Apple disabled support on Mac OS 10.6 for using sparsebundle disk images that reside on filesystems that do not support the F_FULLFSYNC file control. Apple relaxed this requirement in macOS 10.12 (Sierra).

You are likely to encounter this error condition if your sparse bundle disk image is hosted on a pre-Mac OS 10.5 Macintosh or various Network Attached Storage (NAS) devices (especially SMB). When you encounter this error, copy the sparsebundle disk image to another network volume, or ask CCC to create a new sparseimage disk image file (sparseimage disk images are not the same as sparsebundle disk images).

A message for new Mac users coming from the Windows world

Backups on a Windows system are very different from those on a Macintosh. If you're coming from a Windows background, the term "imaging" and the concept of making a disk image backup is probably familiar to you. Restoring from disk image backups is made simpler on Windows because the startup environment is built around them. That's not the case for a Macintosh. When you create a disk image backup of your Mac's startup disk, the logistics of restoring that backup are actually fairly complicated. Due to these complications, we don't recommend using a disk image as your primary backup on a Mac. Disk images are useful for storing a backup of your user data on a network volume, but for your Mac's startup disk, we recommend that you back up directly to a disk that is attached to your Mac; not to a disk image.

Related Documentation

Advanced Settings

$
0
0
Product: 
ccc5

CCC's Advanced Settings are helpful in specific situations, but are not generally required for routine use. Some of these settings involve more risk, so please use them with caution, and don't hesitate to ask questions via the Ask a question about CCC... menu item in CCC's Help menu if the explanations below are insufficient for your particular scenario.

To access the advanced settings, click on the Advanced Settings button below CCC's Source selector.

Advanced settings button

Use strict volume identification

By default, CCC uses the name and Universally Unique Identifier (UUID) of your source and destination to positively identify those volumes. By verifying both of these identifiers, there is less risk in, for example, backing up to a volume that has the same name as your usual destination but is not actually the destination.

While beneficial, this behavior can sometimes have the wrong result. For example, if you rotate between a pair of external hard drives, CCC will not backup to both of them even though they have the same name (e.g. Offsite Backup). CCC will instead claim that the UUID of one of the volumes does not match that of the originally chosen destination.

To accommodate a "rotating pair of backup volumes" solution, you can uncheck this option to indicate that CCC should only use the volume name to identify the destination volume. When deselecting this option, be vigilant that you do not rename your destination volume and that you never attach another non-backup volume to your Mac that is named the same as your destination volume.

This option is automatically disabled when the destination volume does not have a UUID. Network volumes and some third-party filesystems, for example, do not have volume UUIDs.

Note: This setting is only applicable to the destination volume. CCC always uses the name and UUID to positively identify the source volume.

Note: If your rotating destination volumes are encrypted, CCC will only be able to unlock and mount the original encrypted volume selected as the destination for your backup task. CCC must have a unique identifier of the destination volume in order to unlock that volume, and CCC will only retain that information about one destination volume for a particular task. If you would like to rotate a pair of backup disks that are encrypted, we recommend using two separate tasks for that purpose; one for each encrypted destination.

Protect root-level items

If you have files and folders that are unique to the root-level on your destination volume and you want them to be left alone, yet you want to keep your backup "clean", use the Protect root-level items option. This option is enabled by default when CCC's SafetyNet option is enabled. To understand how this feature works, suppose you have these items on your source volume:

And you have these items on the destination volume:

With the Protect root-level items option, the Videos folder will not be moved to the _CCC SafetyNet folder because it is unique to the root level of the destination. The Users folder is not unique to the root of the destination (it also exists on the source), though, so its contents will be updated to match the source. As a result, the olduseraccount folder will be moved to the _CCC SafetyNet folder (or deleted if you have disabled the SafetyNet).

Find and replace corrupted files, "Backup Health Check"

CCC normally uses file size and modification date to determine whether a file should be copied. With this option, CCC will calculate an MD5 checksum of every file on the source and every corresponding file on the destination. If the checksums differ ,CCC will recopy the file. This option will increase your backup time, but it will expose any corrupted files within your backup set on the source and destination.

Media failures occur on nearly every hard drive at some point in the hard drive's life. These errors affect your data randomly, and go undetected until an attempt is made to read data from the failed sector of media. If a file has not been modified since a previous (successful) backup, CCC will not ordinarily attempt to read every byte of that file's content. As a result, it is possible for a corrupted file to go unnoticed on your source or destination volume. Obviously this is a concern if the file is important, and one day you actually need to recover the contents of that file.

Frequent use of the checksum calculation option is unnecessary and may be a burden upon your productivity, so CCC offers weekly and monthly options to limit how frequently the checksumming occurs. 

Note: CCC will never replace a valid file on your destination with an unreadable, corrupt file from the source. If CCC cannot read a file on your source volume, any existing backup of that file will remain intact on your backup volume and CCC will report an error, advising you to replace the source file with the intact backup version. The Find and replace corrupted files setting will only automatically replace corrupted files on the destination, and only when the source file is completely readable.

What is a "corrupted" or "unreadable" file?

With regard to files on the source, CCC's Find and replace corrupted files option specifically refers to files that cannot be physically read from the disk. It does not refer to files that have been mistakenly or maliciously altered such that they cannot be opened by the application that created them.

Using the "Find and replace corrupted files" option to verify your backup

CCC's checksum option verifies the integrity of the files on your destination volume before files are copied, it is not a verification of files that have just been written. In general, the checksum of a file immediately after it is written to disk is of questionable value. Most disks have a write cache, and file data goes to the cache before it is written to actual media. If you write a file and then immediately ask to read it back, as much as x amount of data (where x = the size of the cache) is going to come from the volatile cache. If any of the file's data comes from the write cache, then the checksum doesn't reflect the status of the data on the permanent media, and that really defeats the purpose of checksumming the file in the first place.

If you want to verify the integrity of the files on your destination immediately after copying files, a subsequent backup with CCC's Find and replace corrupted files option is the best way to do that. You can even automate this process by creating a second task that uses this option, then select the second task in the "Run another backup task" popup menu in the After task runs section of advanced settings.

Troubleshooting Options

Run a deletion pass first

When the CCC SafetyNet option is disabled, CCC typically deletes unique items from the destination as it encounters them. CCC iterates through the folders on your source alphabetically, so some files are often copied to the destination before all of the files that will be deleted have been deleted from the destination. If your destination volume has very little free space, CCC may not be able to complete a backup to that volume. This option will cause CCC to run a deletion pass through the entire destination before copying files. Use of this option will make your backup task take longer.

This option will only be enabled when the SafetyNet option is disabled.

Don't update newer files on the destination

Files on the source are generally considered to be the authoritative master, and CCC will recopy a file if the modification date is at all different — newer or older — on the source and destination. Occasionally there are circumstances where the modification date of files on the destination is altered after a backup task runs (e.g. by anti-virus applications), and this alteration causes CCC to copy these files every time. This option can work around these circumstances when the root cause of the modification date alteration cannot be addressed.

Don't preserve permissions

This setting will avoid the errors generated by network volumes that disallow the modification of permissions and ownership on some files. It will also prevent CCC from enabling ownership on the destination volume. Use of this option while backing up applications or macOS system files will prevent those items from working correctly on the destination.

Don't preserve extended attributes

This setting will disable support for reading and writing extended attributes, such as Finder Info, resource forks, and other application-proprietary attributes. Extended attributes store data about the file. Apple explicitly recommends that developers do not store irreplaceable user data in extended attributes when saving a file, because extended attributes are not supported by every filesystem, and could be silently dropped (e.g. by the Finder) when copying a file.

This option is helpful in cases where the source or destination filesystem offers exceptionally poor performance for reading and writing extended attributes, or offers very limited support for macOS native extended attributes such that many errors are reported when trying to copy these metadata.

Related Documentation

Backing up to a disk image

$
0
0
Product: 
ccc5

Disk images are not bootable backups. To create a bootable backup, you must back up to a hard drive that is attached directly to your Mac. We recommend that you only use a disk image if you are backing up to a network volume, and we recommend using locally-attached storage for your primary backups.

A disk image is a single file residing on your hard drive that contains the entire contents of another hard drive (except for the free space). When you want to access the contents of that filesystem, you double-click on the disk image to mount the disk image as if it were an external drive attached to the machine. Carbon Copy Cloner leverages disk images to provide you the flexibility of storing several complete backups on a single shared external hard drive. Disk images also improve the performance of backing up to network attached storage (NAS) devices, such as the Airport Extreme Base Station and Time Capsule.

To back up to a new disk image:

  1. Choose your source volume from the Source selector
  2. Choose New disk image... from the Destination selector
  3. Provide a name and choose a location to save your disk image
  4. If you plan to back up to this disk image again in the future, set the image format to one of the read/write formats. If you want a read-only disk image for archival purposes, set the image format to one of the read-only formats.

To back up to an existing disk image, select Choose disk image... from the Destination selector and locate your disk image.

Read/write "sparseimage" disk images

A sparseimage disk image is a type of read/write disk image that grows as you copy files to it. In general, sparse disk images only consume as much space as the files they contain consume on disk, making this an ideal format for storing backups. Use of this older disk image format is only recommended when backing up to non-AFP network volumes on an OS older than macOS Sierra. Please note that sparseimage files are monolithic and potentially very large files. If the underlying filesystem has a 2TB file size limit and the sparseimage file reaches that limit, the sparseimage file cannot be grown. In most of these cases the sparseimage file becomes corrupted when the underlying filesystem limit is reached, so we don't recommend this disk image format for large data sets.

Read/write "sparsebundle" disk images

A sparse bundle disk image is similar to a sparseimage insofar as it grows as you add data to it, but it retains its data in many smaller files inside of a bundle rather than inside a single file. We recommend this disk image format for most scenarios.

Running out of space on a sparseimage or sparsebundle disk image

CCC reported that the destination is full, but the underlying disk has plenty of free space. CCC initially sets the capacity of your disk image to the amount of free space on the underlying disk. If you have freed up some space on that disk since you created the disk image, you can manually expand the capacity of the destination disk image in Disk Utility. Choose Resize... from the Images menu in Disk Utility, select your destination disk image, then expand it as desired. We recommend that you do not expand the disk image such that it is larger than the capacity of the underlying disk.

The disk image file is larger than the amount of data it contains, why? Sparseimage and sparsebundle disk images grow as you add data to them. They do not, however, automatically shrink when files are deleted from them. As a result, the amount of disk space that the disk image file consumes will not necessarily reflect the amount of data that they consume. To reclaim disk space that is occupied by the free space on your sparse disk image, CCC will compact the disk image before attempting to mount it if the free space on the underlying volume is less than 25GB, or is less than 15% of the total disk capacity. In most cases, you do not need to compact the disk image yourself, but this functionality is documented here so you'll understand why you might see CCC spending time "Compacting the destination disk image" at the beginning of a backup task.

If you would like to compact a disk image manually, drop the disk image file onto this application: Compact Sparse disk images. Be sure to unmount the disk image volume if it is already mounted. Also, note that the compacting process can take a while (e.g. an hour for a 100GB disk image on a locally-attached volume). Finally, be sure that your system is running on AC power. The system utility that compacts the disk image will refuse to run while the system (e.g. a laptop) is running on battery power.

Read-only disk images

Read-only disk images cannot be modified without invalidating the built-in checksum, therefore they are a good container for storing archived material. Compression rates vary on the content of your source, but you can typically expect to reduce the size of your disk image by about half when using compression. There is a subtle behavior that you should take note of when considering this option as a space-saving measure: CCC will first create a read/write disk image, copy the selected items to it, then convert the disk image to read-only compressed. In this case, you will actually need twice the space on your destination as the items to be copied consume on the source.

Encrypting disk images

If any of the data that you are backing up is sensitive, and if your backup device may be in an insecure location, encrypted disk images can improve the security of your backup. CCC offers 128 bit and 256 bit AES encryption to encrypt disk images. To create an encrypted disk image, select one of the encryption levels from the Encryption menu. After you click on the OK button, you will be prompted to specify a passphrase for the new disk image, and CCC will give you an opportunity to save the passphrase in your own keychain. CCC will also store the passphrase in a private keychain so the disk image can be mounted automatically during scheduled backup tasks.

Note: If you create a read-only, encrypted disk image, the intermediate disk image that CCC creates is NOT encrypted. This intermediate disk image file is deleted once the final, read-only, encrypted disk image has been created, but it is not shredded. Take this into consideration when choosing your destination media. If the destination may be placed in an insecure location, use Disk Utility to securely erase free space on the underlying destination volume after you have created your encrypted disk image archive.

Running a backup task whose destination is a disk image on the startup disk

If you specify a disk image that resides on your startup disk as the destination to a scheduled task, CCC will impose some more conservative requirements on this task. To proceed with this configuration, one of the following requirements must be met:

  • The amount of free space on the startup disk is at least 1GB larger than the amount of consumed space on the source volume.
  • The disk image won't grow, e.g. it is a .dmg file, not a sparseimage or sparsebundle disk image.

These requirements avoid a scenario in which the startup disk runs out of free space, causing instability on macOS. If you cannot accommodate the free space requirement, we recommend that you create a .dmg disk image in Disk Utility (choose File > New... > Blank Disk image, set the image format to read/write disk image). Disk Utility will pre-allocate exactly as much space as you request, and CCC will gladly use this disk image without fear of filling up the startup disk.

Sparsebundle disk images are not supported on some filesystems

If your Mac is running an OS older than macOS Sierra, CCC will refuse to save or mount a sparse bundle disk image if the underlying filesystem that the disk image file resides upon does not support the F_FULLFSYNC file control. Most filesystems support this file control, but the SMB file sharing protocol does not. Most people that encounter issues with creating a sparsebundle disk image on a network volume are encountering issues because the network volume is mounted via SMB.

Starting in Mavericks, Apple's preferred file sharing service is SMB. As a result, if you attempt to connect to a network volume, Finder will use SMB to establish that connection unless you explicitly specify AFP as the protocol to use. In this configuration, a sparse bundle disk image will not work, and CCC will issue an error. To avoid this error, connect to the network volume explicitly using AFP:

  1. Eject the network volume if it is currently mounted
  2. Choose Connect to server from the Finder's Go menu
  3. Type in "afp://yourserver.local" (changing the hostname, of course), then click the Connect button and mount the network volume
  4. Go back to CCC and choose Choose disk image... from the Destination selector, then select the sparsebundle disk image on your network volume

Why can't I use a sparsebundle disk image on a filesystem that does not support the F_FULLFSYNC file control?

When your computer writes a file out to the hard drive, the data usually goes to a "write buffer"— a small portion of RAM that is installed on the circuit board of the hard drive. By accumulating smaller write operations onto this RAM chip, the hard drive can increase overall write performance by writing large blocks of cached data to the physical media all at once. While this write buffer improves performance, it also carries a risk. If the power fails or the disk's connection to the computer is suddenly broken between the time that data was written to the buffer and when the buffer is flushed to the disk, your filesystem will have an inconsistency. Filesystem journaling typically mitigates this risk, however it doesn't offer enough protection for Apple's sparsebundle disk image type.

In Mac OS 10.5, Apple implemented the F_FULLFSYNC file control for network servers and clients. The F_FULLFSYNC file control is a command that is sent to the hard drive after some (or all) write operations that tells the disk to immediately flush its cache to permanent storage. To provide better protection for data on sparsebundle disk images, Apple disabled support on Mac OS 10.6 for using sparsebundle disk images that reside on filesystems that do not support the F_FULLFSYNC file control. Apple relaxed this requirement in macOS 10.12 (Sierra).

You are likely to encounter this error condition if your sparse bundle disk image is hosted on a pre-Mac OS 10.5 Macintosh or various Network Attached Storage (NAS) devices (especially SMB). When you encounter this error, copy the sparsebundle disk image to another network volume, or ask CCC to create a new sparseimage disk image file (sparseimage disk images are not the same as sparsebundle disk images).

A message for new Mac users coming from the Windows world

Backups on a Windows system are very different from those on a Macintosh. If you're coming from a Windows background, the term "imaging" and the concept of making a disk image backup is probably familiar to you. Restoring from disk image backups is made simpler on Windows because the startup environment is built around them. That's not the case for a Macintosh. When you create a disk image backup of your Mac's startup disk, the logistics of restoring that backup are actually fairly complicated. Due to these complications, we don't recommend using a disk image as your primary backup on a Mac. Disk images are useful for storing a backup of your user data on a network volume, but for your Mac's startup disk, we recommend that you back up directly to a disk that is attached to your Mac; not to a disk image.

Related Documentation

Excluding files and folders from a backup task

$
0
0
Product: 
ccc5

By default, CCC will copy everything from the volume or folder that you specify as the source. If you do not want to copy every item from the source, you can define a task filter to limit what items will be copied. Choose Copy Some Files from the popup menu underneath the Source selector, or click on the Task Filter button (Task Filter button icon) to open the Task Filters panel.

Default Filter Behavior

The CCC task filter offers two paradigms for defining the task filter. The task filter can either include everything by default or the filter can exclude everything by default. Which behavior you choose depends on what you want CCC to do with new items that are added to the source.

Include everything by default: Define what is excluded

CCC's default behavior is to include everything by default. In this mode you define what is excluded from the backup task by unchecking the box next to an item in the file list. This mode is simplest for users that only want to exclude a handful of items, but generally back up everything because you don't have to revisit the task filter to indicate that new items should be included in the backup task. If you add a file or folder to the source (e.g. in the future after defining your task filter), and that item is not in a folder that you have excluded from the backup task, that item will automatically be included in the backup task.

Exclude everything by default: Define what is included

In this mode, everything is excluded by default, and you define what is included in the backup task by checking the box next to an item in the file list. If you add an item to the source in the future, and that item is not in a folder that is specifically included by the task filter, that item will not be backed up. This mode is helpful in cases where you only want to back up a handful of items on a volume whose subfolders frequently change.

Calculating disk usage and Protected Size

You can right-click on any folder and choose Refresh size to have CCC enumerate the contents of that folder and evaluate the task filter against its contents. CCC will report the total size of the folder and the protected size of the folder (i.e. how much data is included in the backup task). You can also click on the Refresh Disk Usage button to enumerate the contents of the entire source. This could take a while, especially for network volumes, so consider refreshing the disk usage of individual folders instead. If CCC is in the midst of enumerating a folder, you can right-click on that folder to stop enumeration, or click again on the Refresh Disk Usage button to stop the calculation.

Source and destination options

Finder's Trash is excluded by default

By default, CCC won't copy the contents of the Finder Trash because, well, it's Trash. If you want CCC to back up your Trash, open the Task Filter window, then uncheck the Don't copy Finder's Trash box to remove the exclusion. See this section of CCC's documentation to learn more about the idiosyncrasies of the Finder Trash mechanism and how it relates to backing up and restoring the content of the Trash.

Excluded files are not deleted from the destination

When you exclude an item from the CCC backup task, this tells CCC, "Do not copy that item". That does not, however, indicate that CCC should delete that item from the destination, e.g. if it had been copied there by a previous backup task. In fact, excluding an item from the backup task implicitly protects that item on the destination. If you have items on the destination that are now excluded from a backup task that you no longer want to retain on the destination, you can simply remove them from the destination by dragging them to the Trash. If you would like CCC to facilitate that cleanup, check the Remove excluded files checkbox.

This option is ignored if your task is configured with the Don't delete anything SafetyNet setting. This setting also will not override CCC's explicit protections placed on the _CCC SafetyNet folder, so when this option is used in conjunction with CCC's "SafetyNet On" setting, items will be moved to the SafetyNet folder rather than deleted immediately.

Please carefully consider the scope of effect that this option will have when using the Exclude everything by default filter behavior.

The Protect root level items setting is described in more detail in the Advanced Settings article.

Custom Filters

If the files you want to match are scattered across your filesystem, it may be tedious to manually locate each of them and create conventional rules (i.e. check or uncheck the item in the file list). To address this, CCC offers custom filter options in which you define a filter rule using an expression. Choose Show custom filters from the gear menu to reveal the custom filters table.

To add a custom filter rule, click the + button in the custom rules table header, or drag a file or folder from the file list into the custom filters table to add that item as a template. To reorder custom filters, simply drag and drop the items in the custom filters table. Custom filter rules will be evaluated by the task filter before conventional filter rules.

Anchored path filter

An anchored path filter defines a rule using an absolute path relative to the root of the source. /Library/Caches, for example, is an anchored path filter because it starts with a "/". This filter would match /Library/Caches, but would not match /Users/someuser/Library/Caches. You can also include wildcards in the expression, e.g. /Users/*/Library/Caches would match the Library/Caches folder in each user home folder.

Subpath filter

A subpath filter defines a rule using a partial path or filename that does not start with "/". Continuing the example above, Library/Caches would match /Library/Caches and  /Users/someuser/Library/Caches. Wildcards are accepted in the expression; to match a particular file type, use an expression like *.mov to match all .mov files.

Wildcard characters

Wildcard characters can be added to an expression to match a wider range of files and folders. * will match one or more characters in any single file or folder name, e.g. *.mov will match all movie files.

/**/ will match one or more path components, e.g. /Users/**/*.jpg will match any JPEG photos in any user home folders, but won't match JPEG photos elsewhere, e.g. those in /Library/Desktop Pictures. You would also use the ** wildcard when defining an inclusion rule that should copy all items within a particular folder and its subfolders. For example, /Users/yourname/Documents would include only that folder itself, not any of its contents. /Users/yourname/Documents/** would include the Documents folder, all of its contents, and the contents of every subfolder within it.

If you specify additional path components after a ** wildcard, then that wildcard is only applicable up to a match against the path component that follows the wildcard. For example, the exclusion rule /Data/**/Marine/Invertebrates would exclude /Data/2018/Marine/Invertebrates, but it would not exclude /Data/2018/Marine/Benthic/Marine/Invertebrates. In the latter case, **/Marine matches 2018/Marine, but then the the next path component fails to match (and we are deliberately choosing to not allow the ** wildcard to match 2018/Marine/Benthic in this case).

? can be used to match any single character, e.g. *.mp? will match both .mp3 and .mp4 files. Use the ? wildcard sparingly, it will greatly increase the amount of time required to evaluate the task filter.

Expert settings

Custom filter rules are usually applied to include or exclude an item. Exclusions, however, are actually composed of two behaviors: a matching item on the source will not be copied (Hide the item from the copier), and a matching item on the destination will be protected (Protect the item from the copier). Likewise, Inclusions indicate that a matching item on the source will be copied (Show the item to the copier) and a matching item on the destination may be deleted (Risk the item). Occasionally it's helpful to define a rule that affects only matching items on the source or only on matching items on the destination. For example, if you have a folder named "Archives" on the destination that does not exist on the source, that item won't appear in the source list so it cannot be excluded (and thus protected) in the conventional manner. You could add an /ArchivesProtect rule to explicitly protect that item on the destination.

Special considerations for the 'Exclude everything by default' filter behavior and custom rules

Normally the 'Exclude everything by default' filter behavior will ignore any folders on the source that are not explicitly included by your task filter. That 'ignore' behavior imparts explicit protection on those items as well — if those items are present on the destination, CCC will leave them alone. When you add a custom filter to your task, however, CCC must perform a complete scan of the source to find items that match your custom rules. As it does that, CCC must collect a list of all folders on the source. At the end of the scan, many of these folders may be empty. To avoid creating these empty folders on the destination, CCC removes all empty folders from its "list of items to consider". That has the side effect, however, of removing any protection that would be afforded to implicitly excluded folders. Therefore, if you configure a filter to exclude everything by default and add a custom rule to that filter, you should expect CCC to remove any folder on the destination that has no items matching your custom rules. You can avoid that behavior by choosing the 'Don't Delete anything" SafetyNet setting.

Including folders and their content with the 'Exclude everything by default' filter behavior and custom rules

Including a folder or a bundle file and its contents via a custom rule requires a non-intuitive expression, because the filter rule must match multiple path components. To include a folder and all of its contents, add ** to the end of the filter expression. For example, to include the Photos Library from your home directory, the following expression would apply as an inclusion rule:

/Users/johnny/Pictures.Photos Library.photolibrary**

Exporting and Importing filters

A whole task filter can be imported or exported via the gear menu. When importing a filter, the current filter will be replaced with the filter you're importing. CCC will automatically purge conventional rules from the filter if they are not applicable to the currently-selected source. For example, f you had excluded /Applications in the filter, but /Applications does not exist on the current source, that rule will be removed from the filter to avoid unexpected results should an /Applications folder ever be added to the source. This purging is not applicable to custom filter rules.

You can also export individual or groups of custom filter rules. Select the rule(s), then simply drag the items onto your Desktop. To import custom rules from a file exported in this manner, simply drag the file into the custom filter rules table.

Items automatically excluded

Carbon Copy Cloner excludes some items from the backup task by default. A complete list of exclusions along with an explanation for the exclusion is available in this section of the documentation. If you would like to visualize the items that are automatically excluded, hold down the Option key while clicking on the Task Filter button to open the Task Filters window.

The CCC SafetyNet folder, "_CCC SafetyNet" is excluded by a global filter. See the Frequently asked questions about the Carbon Copy Cloner SafetyNet section of the documentation to learn how to restore items from that folder.

Additionally, CCC will exclude and protect system folders if you select the startup disk or a non-HFS+/APFS formatted volume as the destination. If you would like to restore a specific item, such as the contents of /Library/Application Support, this protection can be avoided by choosing a specific folder at the source and destination via the Choose a folder options in the Source and Destination selectors. With great power comes great responsibility — take care to avoid overwriting your system files.

Related documentation

Restoring from a disk image

$
0
0
Product: 
ccc5

You can access the contents of a disk image the same way that you access other volumes and external hard drives on macOS. Double-click on the disk image file to mount its filesystem, then navigate the filesystem in the Finder to access individual files and folders. If you have the permission to access the files that you would like to restore, simply drag those items to the volume that you would like to restore them to.

Restoring individual items or an entire disk image to another hard drive using CCC

While you cannot boot macOS from a disk image directly, you can restore the disk image to a volume. When you use CCC to restore the disk image to a volume, the resulting restored volume will be bootable (assuming that you had initially backed up a bootable system). To restore files or an entire filesystem from a disk image:

  1. Launch CCC
  2. Select Restore from disk image... from the Source selector and locate your backup disk image. CCC will mount the disk image for you.
  3. Choose a volume from the Destination selector. You may choose the startup disk as a destination, but CCC will not permit you to restore system files to the currently-running OS.
  4. If you do not want to restore everything, choose Some files... from the Clone menu (below the Source selector) and deselect any item that you do not wish to restore.
  5. Click the Clone button. The files will be restored to their original locations.

Restoring system files to your startup disk

If you want to restore system files to your startup disk, you must start up your Macintosh from an installation of macOS on another hard drive, such as a bootable backup created by CCC. Once you have booted your Mac from another volume, follow the steps from the previous section.

Restoring system files to your startup disk when you don't have a bootable backup

If you do not have an installation of macOS on another hard drive, you can boot your Mac from your macOS Recovery volume and use Disk Utility to restore the entire disk image:

High Sierra and Mojave

Note: The destination volume format must match the format of the disk image that you're restoring from. This limitation is specific to Disk Utility – if you're restoring from a disk image using CCC, CCC can restore an APFS disk image to an HFS+ volume, and you can restore an HFS+ disk image to an APFS volume. Use Disk Utility as a last resort.

  1. Hold down Command+R while you restart your computer.
  2. Choose Disk Utility in the Utilities application.
  3. Choose Show All Devices from the View menu.
  4. Click on the device you want to restore to in the sidebar (see this article for specific formatting instructions).
  5. Click the Erase button in the toolbar and proceed to erase the device using the GUID Partition Map partitioning scheme, and the format that matches your source disk image.
  6. Reselect the volume that you would like to restore to. If you are restoring to an APFS volume, choose the parent APFS container.
  7. Choose Open Disk Image... from the File menu and select the disk image file that you would like to restore from.
  8. Choose Restore... from the Edit menu.
  9. Select the mounted disk image volume that you would like to restore. If you are restoring to an APFS volume, choose the container that is the parent of the disk image volume you are trying to restore.
  10. Click the Restore button.

El Capitan and Sierra

  1. Hold down Command+R while you restart your computer
  2. Choose Disk Utility in the Utilities application
  3. Click on the volume you want to restore to in the sidebar
  4. Choose Restore... from the Edit menu
  5. Click on the Image... button and locate the disk image that you would like to restore
  6. Click the Restore button

Yosemite

  1. Hold down Command+R while you restart your computer
  2. Choose "Disk Utility" in the Utilities application
  3. From the File menu, choose Open Disk Image... and locate the disk image that you would like to restore
  4. In the list in the pane on the left, click on the mounted disk image's volume
  5. Click on the Restore tab on the right side of the window
  6. Drag the mounted disk image to the Source field. If the Source field does not accept the dragged volume, right-click on the disk image's mounted volume and choose Set as source from the contextual menu.
  7. Drag the hard drive that you would like to restore to into the Destination field
  8. Check the box to erase the destination (if present), then click on the Restore button.
  9. Restart your Mac from your newly restored volume, then use CCC to restore the Recovery HD volume from the archive on your startup disk.

Using Migration Assistant to migrate data from a disk image

If you have a clean installation of macOS and simply want to restore your user data from a full-system backup on a disk image, you can use Migration Assistant for this task. Simply mount the disk image, then open Migration Assistant and proceed as directed, using the mounted disk image as the source. Note that Migration Assistant will only accept a disk image that has a full system backup, it will not accept a disk image that has only user data.

Migration Assistant and the CCC SafetyNet

If your backup volume has a "_CCC SafetyNet" folder, you can move that folder to the Trash before using Migration Assistant to avoid copying that folder during a migration. This is particularly important if that folder has a lot of data in it and you're migrating to a disk that is smaller than the backup volume. If you would like to retain the SafetyNet folder on the backup volume, don't empty the Trash. After Migration Assistant has completed, then you can move the SafetyNet folder back to the root of the backup volume.

Migration Assistant and Yosemite, El Capitan

On Yosemite and El Capitan, Migration Assistant will ask that you close all applications, and it will then log you out before presenting migration options. This poses a problem for migrating data from a disk image because the disk image will be unmounted when you are logged out, and Migration Assistant doesn't offer any interface to choose a disk image. To work around this problem, you can use our Mount disk image for Migration Assistant application. Simply drag the disk image containing your full system backup onto the application and it will guide you through a fairly simple procedure that will make the disk image available to Migration Assistant after a short delay.

Preliminary tests indicate that this workaround is not required on Sierra and later OSes.

Using Carbon Copy Cloner to back up to/from another Macintosh on your network

$
0
0
Product: 
ccc5

Carbon Copy Cloner offers the option of securely copying your selected data to another Macintosh on your network (or anywhere on the Internet for that matter) via the Remote Macintosh... options in the Source and Destination selectors. After a brief setup procedure to establish trust between your Mac and the destination Mac, simply choose the source or destination volume/folder on the remote Mac and CCC will take care of the rest.

Before setting up CCC to back up to a remote Macintosh, you must:

  1. Confirm that the remote Macintosh is running a supported OS (OS X 10.7 or later)
  2. Enable Remote Login in the Sharing Preference Pane on the remote Macintosh
  3. Verify that any firewalls between the two Macs are permitting "secure shell" traffic over port 22 (or a custom port that you specify).

Enabling Remote Login on the remote Macintosh

To enable Remote Login on your remote Macintosh:

  1. Log in to that machine as an admin user.
  2. Open the System Preferences application.
  3. Open the Sharing Preference Pane.
  4. Check the box next to Remote Login.
  5. Be sure to allow access to All users, or explicitly add the Administrators group to the list of restricted users and groups.
  6. Make a note of your remote Mac's hostname. The hostname is indicated underneath the Computer Name text field. In the screenshot below, "Apollo.local" is the hostname of the remote Macintosh.
Enable Remote Login

Configuring a Remote Macintosh source or destination

With the Remote Login service enabled on the remote Mac, the next step is to choose Remote Macintosh... from CCC's Source or Destination selector. CCC will present a browser that lists any hosts on your local network that advertise the Remote Login service. Find and select your remote Mac in this list, then click the Connect button. If you do not see your Mac listed here, type in the hostname of your remote Mac, then click the Connect button. If the remote Mac is not on your local network, you may need to specify the IP address of the public-facing router that your Mac resides behind. Be sure to configure the router to forward port 22 traffic to the IP address that is assigned to the remote Mac.

Connect to host

Once CCC has established a connection to the remote Mac, you will be prompted to install a Mac-specific Public Key Authentication (PKA) key pair onto the remote Mac. You must provide the username and password of an admin user on the remote Mac to permit this, and that admin user must have a non-blank password. Those requirements are only for the initial public key installation. For future authentication requests, CCC will use the PKA key pair.

Note: This step establishes a high level of trust between the local and remote Mac; this is required to correctly preserve system files. The local Mac will have access to all data on the remote Mac, and administrative users on the remote Mac can gain access to the data that you back up to that Mac. Both Macs should be within your administrative control.


Authenticate to the remote Mac

Install Key

Once you have connected to the remote Mac and installed CCC's key on that system, CCC will present a volume browser. Select the volume or folder to use as the source or destination for your task. Note: avoid selecting a volume or folder that contains an apostrophe (').

Connect to host

Bandwidth management options

CCC offers two options that can help you address bandwidth concerns. The option to Compress data passed over the network can greatly reduce your backup time and total bandwidth used. The time savings depend on just how slow the connection is between the two Macs. If you have a connection that is slower than 10MB/s, compression will make the transfer faster. If your bandwidth is better than that, compression may actually slow down your transfer. CCC will not compress certain file types that are already compressed, such as graphics files, movies, and compressed archives. Specifying the option to compress data passed over the network does not create a proprietary or compressed backup; files are automatically decompressed on the destination volume on the remote Macintosh.

CCC also offers a bandwidth limitation option. If your ISP requires that your transfers stay below a certain rate, you can specify that rate here. Note that CCC errs on the conservative side with this rate, so the average transfer rate may be slightly lower than the limitation that you specify.

De-authenticating a remote Macintosh

If you no longer wish to use a particular remote Macintosh, you can click the Deauthenticate... button to remove CCC's PKA key pair from the remote Mac.

Remote Macintosh prerequisites

At this time, CCC requires the use of the root account (though it does not have to be enabled) on both the source and destination Macs. To successfully back up to a remote Macintosh, you must have administrative privileges on both machines.

CCC also requires that the remote Macintosh be running macOS 10.7 or later. Non-Macintosh systems are not supported with the Remote Macintosh feature.

Note for Yosemite, El Capitan, & Sierra users: If your source contains macOS Yosemite (or later) system files, the Remote Macintosh must be running macOS 10.9.5 or later. If the Remote Macintosh is not running 10.9.5 or later and you attempt to back up macOS Yosemite (or later) system files, the backup task will report numerous "Input/output" ("Media") errors. Filesystem changes introduced on Yosemite cannot be accommodated by older OSes. Apple added support for those filesystem changes in 10.9.5 to offer a modest amount of backwards compatibility.

Additional pointers for advanced users

Carbon Copy Cloner's public key-based authentication is designed to work with no additional configuration of the services required for backing up over a network connection. CCC uses rsync over an ssh tunnel to perform the backup. If you do make modifications to the sshd configuration, you should consider how that may affect your backup. For example, CCC requires use of the root account over ssh. If you set the "PermitRootLogin" key in the sshd_config file to "no", you will not be able to use CCC to or from that machine. It's an important distinction to note that the root account does not have to be enabled, but sshd must permit the use of the root account. The "PubkeyAuthentication" key must also not be set to "no", because Public Key Authentication is required for CCC to authenticate to the remote Mac. CCC will attempt to proactively present these configuration scenarios to you if authentication problems are encountered.

Additionally, the initial Public Key Authentication (PKA) setup requires the use of an admin user on the remote Macintosh. That admin user account must have a non-blank password, and the Remote Login service must permit password-based authentication. These requirements apply only to the initial installation of CCC's PKA credentials. Once CCC has installed these credentials on the remote Mac, CCC will use PKA for authentication to the remote Mac.

Troubleshooting connectivity problems to a remote Macintosh

Problems connecting to a remote Macintosh generally are caused by configuration problems with the Remote Login service on the remote Macintosh. Try the following if you are having trouble making a backup to a remote Mac:

  1. Verify that the Remote Login service is enabled in the Sharing preference pane on the Remote Macintosh.
  2. Verify that access to the Remote Login service is allowed for All users.
  3. Re-select Remote Macintosh from CCC's Source or Destination selector and verify that authentication to the remote Mac is configured.
  4. Verify that your firewall and the remote Mac's firewall permits traffic on port 22. If you have an application firewall in place (e.g. Little Snitch), verify that access is granted to CCC's privileged helper tool, "com.bombich.ccchelper".
  5. If your local Mac and remote Mac are not on the same network (e.g. you're connecting across a VPN or through a router and over the Internet), confirm that a connection can be established between the two Macs. How you do this will vary from one scenario to the next, but you can generally verify connectivity by typing "ssh root@192.168.1.1" into the Terminal application (replace 192.168.1.1 with the hostname or IP address of your remote Mac). If you see a request for a password, then connectivity is established. If not, your network configuration isn't permitting the traffic, or the hostname that you're connecting to is invalid or unavailable. If you are accessing a remote Mac that is behind a router, consult the router's port forwarding documentation and verify that port 22 traffic is directed to the internal IP address of the remote Mac.

VPN and port forwarding configuration is outside of the scope of support for CCC, though our support staff will make every effort to identify whether problems are occurring within that configuration or within the service configuration on your remote Mac. If you have worked through the troubleshooting steps above and are still having trouble backing up to a remote Macintosh, please choose Report a problem from CCC's Help menu and submit a support request.

Meraki router intercepts Secure Shell traffic

Some users that have a Meraki router involved in their configuration have reported that its default configuration will interrupt Secure Shell traffic. The firewall rule that causes interference is in place to protect the network from vulnerabilities that are irrelevant between two modern Macs. Nonetheless, the firewall intercepts traffic after initially allowing a connection, which is presented by CCC as a "lost connection" or a failure to authenticate to the remote Mac. The following steps correct the Meraki configuration concern:

  1. Log into the Meraki as an administrative user and open the "Security report"
  2. Filter the log for SSH events
  3. Click the "SSH_EVENT_REPOVERFLOW" event from the list to open it and review the blocked event
  4. To allow the blocked traffic of this type, click "Yes" to add this event to the whitelist.

Thomson Gateway router intercepts Secure Shell traffic

Similar to the problem described above for Meraki router, the Thomson Gateway router can also cause interference that appears as an authentication failure. Forwarding traffic to a non-standard secure shell port (e.g. 2222, then be sure to specify that port when connecting to the Remote Macintosh in CCC) resolves the problem.

A note about access privileges to backed up data

While logged in to your remote Macintosh, you may not have permission to view the contents of your backup in the Finder. Your access to the files will be based on the unique id that is associated with the user account that you're logged in to on the remote Macintosh and the one associated with the account(s) on the other Mac(s) that you're backing up. The first administrator account always gets a uid of "501", and subsequent accounts are assigned incrementally higher uids — 502, 503, etc. For security and privacy purposes, macOS restricts access to the contents of user home directories to the owners of those home directories, and these restrictions are preserved when your data is backed up to a remote Macintosh.

To learn what user id is associated with your account:

  1. Open System Preferences and click on the User Accounts preference pane.
  2. Click on the lock and authenticate.
  3. Control+click on your account in the accounts table and choose "Advanced options".

You will see your User ID in the panel that appears.

This may be annoying from the perspective of trying to access those files on your remote Macintosh, but it is important for CCC to preserve the ownership and permissions information when backing up your data. If/when you want to do a restore, you could do either of the following:

a) Attach the external drive directly to the machine that you want to restore files to — the accounts on those systems will be able to access their backed up files.

b) Do a restore directly within CCC from the original source Macintosh.

If you must have read access to some of this data (e.g. the original Mac is gone, the user account changed, etc.), you can change the ownership of the home folder and its contents in the Finder:

  1. Choose Get Info from Finder's File menu.
  2. In the Sharing and Permissions section at the bottom, click on the lock icon to make the permissions editable.
  3. Click on the + button.
  4. In the window that appears, select your account, then click the Select button.
  5. Set the access privileges to Read & Write.
  6. Click on the Gear menu and choose to apply the change to enclosed items.

Making bootable backups on remote Macs

If you are attempting to create a bootable backup of your Mac, you should attach the backup disk directly to your local Mac for an initial backup task. After verifying that the backup volume is bootable, you can then attach that disk to a remote Macintosh and proceed with regular backups. You should also repeat the local backup any time you apply major operating system upgrades so that any helper partitions on the backup disk can be updated accordingly.

Related Documentation

Excluding files and folders from a backup task

$
0
0
Product: 
ccc5

By default, CCC will copy everything from the volume or folder that you specify as the source. If you do not want to copy every item from the source, you can define a task filter to limit what items will be copied. Choose Copy Some Files from the popup menu underneath the Source selector, or click on the Task Filter button (Task Filter button icon) to open the Task Filters panel.

Default Filter Behavior

The CCC task filter offers two paradigms for defining the task filter. The task filter can either include everything by default or the filter can exclude everything by default. Which behavior you choose depends on what you want CCC to do with new items that are added to the source.

Include everything by default: Define what is excluded

CCC's default behavior is to include everything by default. In this mode you define what is excluded from the backup task by unchecking the box next to an item in the file list. This mode is simplest for users that only want to exclude a handful of items, but generally back up everything because you don't have to revisit the task filter to indicate that new items should be included in the backup task. If you add a file or folder to the source (e.g. in the future after defining your task filter), and that item is not in a folder that you have excluded from the backup task, that item will automatically be included in the backup task.

Exclude everything by default: Define what is included

In this mode, everything is excluded by default, and you define what is included in the backup task by checking the box next to an item in the file list. If you add an item to the source in the future, and that item is not in a folder that is specifically included by the task filter, that item will not be backed up. This mode is helpful in cases where you only want to back up a handful of items on a volume whose subfolders frequently change.

Calculating disk usage and Protected Size

You can right-click on any folder and choose Refresh size to have CCC enumerate the contents of that folder and evaluate the task filter against its contents. CCC will report the total size of the folder and the protected size of the folder (i.e. how much data is included in the backup task). You can also click on the Refresh Disk Usage button to enumerate the contents of the entire source. This could take a while, especially for network volumes, so consider refreshing the disk usage of individual folders instead. If CCC is in the midst of enumerating a folder, you can right-click on that folder to stop enumeration, or click again on the Refresh Disk Usage button to stop the calculation.

Source and destination options

Finder's Trash is excluded by default

By default, CCC won't copy the contents of the Finder Trash because, well, it's Trash. If you want CCC to back up your Trash, open the Task Filter window, then uncheck the Don't copy Finder's Trash box to remove the exclusion. See this section of CCC's documentation to learn more about the idiosyncrasies of the Finder Trash mechanism and how it relates to backing up and restoring the content of the Trash.

Excluded files are not deleted from the destination

When you exclude an item from the CCC backup task, this tells CCC, "Do not copy that item". That does not, however, indicate that CCC should delete that item from the destination, e.g. if it had been copied there by a previous backup task. In fact, excluding an item from the backup task implicitly protects that item on the destination. If you have items on the destination that are now excluded from a backup task that you no longer want to retain on the destination, you can simply remove them from the destination by dragging them to the Trash. If you would like CCC to facilitate that cleanup, check the Remove excluded files checkbox.

This option is ignored if your task is configured with the Don't delete anything SafetyNet setting. This setting also will not override CCC's explicit protections placed on the _CCC SafetyNet folder, so when this option is used in conjunction with CCC's "SafetyNet On" setting, items will be moved to the SafetyNet folder rather than deleted immediately.

Please carefully consider the scope of effect that this option will have when using the Exclude everything by default filter behavior.

The Protect root level items setting is described in more detail in the Advanced Settings article.

Custom Filters

If the files you want to match are scattered across your filesystem, it may be tedious to manually locate each of them and create conventional rules (i.e. check or uncheck the item in the file list). To address this, CCC offers custom filter options in which you define a filter rule using an expression. Choose Show custom filters from the gear menu to reveal the custom filters table.

To add a custom filter rule, click the + button in the custom rules table header, or drag a file or folder from the file list into the custom filters table to add that item as a template. To reorder custom filters, simply drag and drop the items in the custom filters table. Custom filter rules will be evaluated by the task filter before conventional filter rules.

Anchored path filter

An anchored path filter defines a rule using an absolute path relative to the root of the source. /Library/Caches, for example, is an anchored path filter because it starts with a "/". This filter would match /Library/Caches, but would not match /Users/someuser/Library/Caches. You can also include wildcards in the expression, e.g. /Users/*/Library/Caches would match the Library/Caches folder in each user home folder.

Subpath filter

A subpath filter defines a rule using a partial path or filename that does not start with "/". Continuing the example above, Library/Caches would match /Library/Caches and  /Users/someuser/Library/Caches. Wildcards are accepted in the expression; to match a particular file type, use an expression like *.mov to match all .mov files.

Wildcard characters

Wildcard characters can be added to an expression to match a wider range of files and folders. * will match one or more characters in any single file or folder name, e.g. *.mov will match all movie files.

/**/ will match one or more path components, e.g. /Users/**/*.jpg will match any JPEG photos in any user home folders, but won't match JPEG photos elsewhere, e.g. those in /Library/Desktop Pictures. You would also use the ** wildcard when defining an inclusion rule that should copy all items within a particular folder and its subfolders. For example, /Users/yourname/Documents would include only that folder itself, not any of its contents. /Users/yourname/Documents/** would include the Documents folder, all of its contents, and the contents of every subfolder within it.

If you specify additional path components after a ** wildcard, then that wildcard is only applicable up to a match against the path component that follows the wildcard. For example, the exclusion rule /Data/**/Marine/Invertebrates would exclude /Data/2018/Marine/Invertebrates, but it would not exclude /Data/2018/Marine/Benthic/Marine/Invertebrates. In the latter case, **/Marine matches 2018/Marine, but then the the next path component fails to match (and we are deliberately choosing to not allow the ** wildcard to match 2018/Marine/Benthic in this case).

? can be used to match any single character, e.g. *.mp? will match both .mp3 and .mp4 files. Use the ? wildcard sparingly, it will greatly increase the amount of time required to evaluate the task filter.

Expert settings

Custom filter rules are usually applied to include or exclude an item. Exclusions, however, are actually composed of two behaviors: a matching item on the source will not be copied (Hide the item from the copier), and a matching item on the destination will be protected (Protect the item from the copier). Likewise, Inclusions indicate that a matching item on the source will be copied (Show the item to the copier) and a matching item on the destination may be deleted (Risk the item). Occasionally it's helpful to define a rule that affects only matching items on the source or only on matching items on the destination. For example, if you have a folder named "Archives" on the destination that does not exist on the source, that item won't appear in the source list so it cannot be excluded (and thus protected) in the conventional manner. You could add an /ArchivesProtect rule to explicitly protect that item on the destination.

Special considerations for the 'Exclude everything by default' filter behavior and custom rules

Normally the 'Exclude everything by default' filter behavior will ignore any folders on the source that are not explicitly included by your task filter. That 'ignore' behavior imparts explicit protection on those items as well — if those items are present on the destination, CCC will leave them alone. When you add a custom filter to your task, however, CCC must perform a complete scan of the source to find items that match your custom rules. As it does that, CCC must collect a list of all folders on the source. At the end of the scan, many of these folders may be empty. To avoid creating these empty folders on the destination, CCC removes all empty folders from its "list of items to consider". That has the side effect, however, of removing any protection that would be afforded to implicitly excluded folders. Therefore, if you configure a filter to exclude everything by default and add a custom rule to that filter, you should expect CCC to remove any folder on the destination that has no items matching your custom rules. You can avoid that behavior by choosing the 'Don't Delete anything" SafetyNet setting.

Including folders and their content with the 'Exclude everything by default' filter behavior and custom rules

Including a folder or a bundle file and its contents via a custom rule requires a non-intuitive expression, because the filter rule must match multiple path components. To include a folder and all of its contents, add ** to the end of the filter expression. For example, to include the Photos Library from your home directory, the following expression would apply as an inclusion rule:

/Users/johnny/Pictures/Photos Library.photolibrary**

Exporting and Importing filters

A whole task filter can be imported or exported via the gear menu. When importing a filter, the current filter will be replaced with the filter you're importing. CCC will automatically purge conventional rules from the filter if they are not applicable to the currently-selected source. For example, f you had excluded /Applications in the filter, but /Applications does not exist on the current source, that rule will be removed from the filter to avoid unexpected results should an /Applications folder ever be added to the source. This purging is not applicable to custom filter rules.

You can also export individual or groups of custom filter rules. Select the rule(s), then simply drag the items onto your Desktop. To import custom rules from a file exported in this manner, simply drag the file into the custom filter rules table.

Items automatically excluded

Carbon Copy Cloner excludes some items from the backup task by default. A complete list of exclusions along with an explanation for the exclusion is available in this section of the documentation. If you would like to visualize the items that are automatically excluded, hold down the Option key while clicking on the Task Filter button to open the Task Filters window.

The CCC SafetyNet folder, "_CCC SafetyNet" is excluded by a global filter. See the Frequently asked questions about the Carbon Copy Cloner SafetyNet section of the documentation to learn how to restore items from that folder.

Additionally, CCC will exclude and protect system folders if you select the startup disk or a non-HFS+/APFS formatted volume as the destination. If you would like to restore a specific item, such as the contents of /Library/Application Support, this protection can be avoided by choosing a specific folder at the source and destination via the Choose a folder options in the Source and Destination selectors. With great power comes great responsibility — take care to avoid overwriting your system files.

Related documentation


Performing actions Before and After the backup task

$
0
0
Product: 
ccc5

Often when you have a backup task that runs on a scheduled basis, there are associated tasks that you would like to perform before or after files are actually copied. CCC offers the option to run shell scripts before and after a backup task, unmount or set the destination as the startup disk, run another CCC backup task, and power management options such as restart and shutdown. If you would like to perform any of these pre or post clone tasks, click the Advanced Settings button below CCC's Source selector.

Mounting the source or destination volume before a backup task begins

Without any additional configuration, CCC will attempt to mount your source and destination volumes before a backup task begins. This applies to many different volume types — ordinary volumes on locally-attached hard drives, disk images, network volumes, encrypted volumes – even encrypted volumes on remote Macs. If your source or destination volume is on a disk that is physically attached to your Mac (e.g. via Firewire, Thunderbolt, or USB), but it is not mounted, CCC can "see" that device and will attempt to mount it. If your source or destination is a network volume, CCC will obtain the credentials that you use to mount that device when you create the backup task, and will use those credentials to mount the volume before the task begins.

This also applies for nested volumes. For example, suppose you are backing up to a disk image on a network volume. CCC will first attempt to mount the network volume, then it will attempt to mount the disk image. Likewise, suppose you have a task configured to back up the contents of a folder on an encrypted volume. If you have saved the encrypted volume's passphrase in CCC's keychain, CCC will unlock and mount the encrypted volume before the backup task begins.

CCC's attempts to mount the source and destination volumes occur automatically before any other tasks, including pre clone shell scripts (described below), therefore it is not necessary to implement a shell script to pre-mount the source or destination.

Little Snitch may prevent the automated mounting of network volumes

If you're using Little Snitch to monitor and filter your inbound and outbound network traffic, you may find that CCC has trouble automatically mounting a network volume. If you run into this problem, configure Little Snitch to allow network access to the NetAuthSysAgent system service. NetAuthSysAgent is the macOS system service that fulfills application requests to mount network volumes.

SafetyNet Pruning

SafetyNet pruning is covered in more detail in this section of CCC's documentation.

Destination volume options

If you would like CCC to unmount your destination volume at the end of the backup task, choose Unmount the destination volume from the Destination volume management menu. If your destination is a folder, the text will be Unmount the underlying volume. If the destination is a disk image, CCC always unmounts the disk image volume, so this setting refers to the underlying physical volume upon which the disk image resides.

CCC will not forcefully unmount the destination volume. If an application has open files on the destination volume, CCC's attempt to unmount the volume will fail. CCC does not report this as an error, though it will make a note of it in the Task History window.

Yosemite users have an option to set the destination volume as the startup disk. Starting in El Capitan, however, Apple's System Integrity Protection prevents third-party applications from changing the startup disk setting. We do not recommend disabling System Integrity Protection to make this feature work, rather we recommend that you use the Startup Disk Preference Pane to change the startup disk selection.

Power management options

By default, at the end of a backup task, CCC will not perform any power management tasks. Instead, the system will perform as defined by the settings in the Energy Saver preference pane. For example, if you have the system configured to idle sleep after 20 minutes, the system will go to sleep if there hasn't been any user activity in the last 20 minutes. CCC activity is not considered user activity, so often the system will go to sleep immediately after CCC finishes a backup task.

If you choose one of the options from the Power management menu, CCC will reboot or shut down your Mac when the backup task finishes. The reboot and shutdown options are not forceful. If you have a document open with unsaved modifications, for example, the application would prompt you to save the document. If a save dialog is not attended to, the shutdown or reboot request will time out.

Turn off the computer if it was previously off

If your backup task is scheduled to run on a regular basis, this option will be enabled in the Power Management popup menu. This option is applicable if you would like to have CCC shut down your Mac at the end of the task, but only in cases where the Mac was booted at the task's scheduled run time. If your backup task runs when the system has been on for a while or has been sleeping, CCC will not shut down the Mac when using this option.

Power Management options are ignored in some cases

Power management options will not be applied to backup tasks that are cancelled (e.g. you click the Stop button). Additionally, power management tasks will not be applied if other CCC backup tasks are running or queued to run immediately after the current task finishes running. If your task is running as part of a Task Group, power management options will be deferred to when all tasks within the group have completed.

Power Management options are applied regardless of task success

Power management options will be applied whether the backup task completes successfully or not. If you prefer for a backup task to perform the power management action only when the backup task exits without error, see the pm_on_success.sh postflight script below.

Run another backup task (task chaining)

If you have more than one CCC backup task configured, the other tasks will be listed in this popup menu. To create a task chain (e.g. to run tasks sequentially), simply choose one of these tasks to have that task run automatically after the current task finishes. Tasks run in this manner will start after the current task has finished completely. Chained tasks will run regardless of the exit status of a preceding task in the chain, e.g. if the first task reports errors or fails to run at all, the second task will still run.

Running shell scripts before and after the backup task

If there is functionality that you need that does not exist within CCC, pre and post clone shell scripts may be the solution for you. Pre clone shell scripts run after CCC has performed "sanity" checks (e.g. are the source and destination volumes present, is connectivity to a remote Macintosh established) but before copying files. If you need your preflight script to run before CCC does the source/destination sanity checks, specify the preflight script as a global preflight script in the Advanced section of CCC's Preferences window. Note that global preflight scripts run prior to every task, they are not task-specific. Also, please bear in mind that CCC automatically attempts to mount the source and destination at the beginning of the task, you should not be implementing a shell script to achieve that functionality. If you're having trouble with CCC pre-mounting the source and destination, please ask us for help rather than attempt to address the issue with a preflight shell script.

Post-clone shell scripts run after CCC has finished copying files and performing its own internal cleanup, but before unmounting any volumes.

CCC passes several parameters to pre and post clone shell scripts. For example, the following shell script:

#!/bin/sh

echo "Running $0"
echo `date`
echo "Source: $1"
echo "Destination: $2"
echo "Third argument: $3" # Exit status for post-clone scripts, underlying volume path for a disk image for pre-clone scripts
echo "Fourth argument: $4" # Destination disk image path, if applicable


Would produce the following output (you can redirect this output to a file of your own specification) if implemented as a post clone script:


Running /Library/Application Support/com.bombich.ccc/Scripts/postaction.sh
Wed Oct 8 21:55:28 EDT 2014
Source: /
Destination: /Volumes/Offsite Backup
Third argument: 0
Fourth argument:

First parameter

The path to the source volume or folder. If the source volume is APFS-formatted, then this path will usually be the path to a temporary, read-only snapshot of the source (or the path to the source folder on the temporary, read-only snapshot).

Second parameter

The path to the destination volume or folder. If the destination is a disk image, this is the path to the mounted disk image.

Third parameter

  • Pre clone script: The underlying mountpoint for the volume that holds the destination disk image, if applicable.
  • Post clone script: The exit status of the file copying phase of the backup task.

Fourth parameter

The path to the destination disk image, if applicable.

If your pre clone script exits with a non-zero exit status, it will cause CCC to abort the backup task. This can be used to your advantage if you want to apply preconditions to your backup operation. If you want to be certain that errors in your pre clone shell script never cause the backup task to be aborted, add "exit 0" to the end of your script. If you would like that script to silently cancel the backup task, add "exit 89" to the end of the script. If the script is a global preflight script (specified in the Advanced section of CCC's Preferences window), you can add "exit 104" to the end of the script to cancel the backup task and to avoid recording a Task History event.

The post clone script will run whether the backup task exits successfully or not. If your script should behave differently depending on the result of the task, you can test whether the third parameter is zero (an exit status of "0" means the task ended successfully). For example:

#!/bin/sh

source="$1"
dest="$2"
exitStatus=$3

if [ "$exitStatus" = "0" ]; then
    # foo
else
    # bar
    # Note: Do not assume that $source and $dest are populated
    # These will be empty if source or destination validation fails
fi

If your postflight script exits with a non-zero exit status, CCC will not report this as a failure of the backup task. The failure will be noted in the Task History window, however.

AppleScripts are not supported

You cannot specify an AppleScript as a pre or post clone script, CCC currently only supports running shell scripts.

Shell scripts require a shell interpreter line

CCC does not assume a default shell environment when running your pre or postflight script. Not doing so gives users a great deal of flexibility; they can choose to write their scripts in any shell or programming language (e.g. bash, python, perl, ruby, C). For CCC to execute a shell script as an application, though, the system needs to know what shell should be used to interpret the script, and that value needs to be defined in your shell script. This is done simply by placing a shell interpreter line at the top of the file, e.g. #!/bin/sh.

Security implications of pre and post clone shell scripts

CCC's pre and post clone shell scripts are executed as the System Administrator (aka "root"). To prevent unauthorized modifications to your shell scripts, we recommend that you restrict the ownership and permissions of these scripts and to the folder in which they are contained. The parent folder and scripts should be writable only by the root user. For example, running the following in the Terminal application would secure any shell scripts located in the default location for pre and post clone scripts:

sudo chown -R root:wheel /Library/Application\ Support/com.bombich.ccc/Scripts
sudo chmod -R 755 /Library/Application\ Support/com.bombich.ccc/Scripts

To further enhance the security of your pre and postflight scripts, CCC will require that scripts stored in the default location are owned by the root user and writable only by the root user, and that the Scripts folder itself is also owned and writable only by the root user. If a script that resides within the default Scripts folder does not meet these requirements, CCC will refuse to execute that script and the associated task will report an error.

After copying scripts into CCC's Scripts folder or making changes to those scripts, you can choose "Secure CCC's Scripts folder" from CCC's Utilities menu to correct any ownership or permissions concerns. Please note that these additional security requirements are only applied to scripts stored within the /Library/Application Support/com.bombich.ccc/Scripts folder. If you prefer to manage the security of your shell scripts on your own, you may store them in another location.

Example pre and post clone shell scripts

To use any of these example scripts, download the script and place it somewhere on your startup disk. By default, CCC looks in /Library/Application Support/com.bombich.ccc/Scripts.

parallels_pause.sh
This is a pre clone script that you can use to pause all currently-running Parallels VM containers. This script will also retain state information that can be read by the corresponding parallels_start.sh post clone script to resume these VMs after the backup task has completed. Note: This script relies on command-line tools offered only in Parallels Desktop for Mac Pro or Business Edition. 

parallels_start.sh
This post clone script will resume any Parallels VM containers that were suspended by the parallels_pause.sh pre clone script. Note: This script relies on command-line tools offered only in Parallels Desktop for Mac Pro or Business Edition.

play_sound.sh
If you want to play a unique sound, use this script. You can plug in the path to any audio file of your liking or try one of the examples included.

eject_source_and_destination.sh
CCC's option to automatically unmount the destination volume is a volume-level task, not a device task. It's also limited to the destination. If you want to eject the destination device, or if you want to unmount or eject the source, use this post clone script instead. Note that ejecting a device will unmount all volumes on the device. Also note that this example script adds a 60-second delay to accommodate macOS's desire to automatically regenerate various cache files. This delay can be adjusted if necessary by editing the script.

pm_on_success.sh
This post clone script will perform the requested power management option (e.g. shutdown, restart, sleep) at the end of the backup task if the backup task completes without errors. Use this in lieu of one of the Power Management postflight options if you prefer the power management action does not occur when a task ends with errors (e.g. if the destination volume is missing).

quit_application.sh and open_application.sh
This pair of scripts can be used to quit and open an application before and after the backup task. Open these scripts in a text editor to define the application that should be quit or opened.

post_to_slack.sh
This postflight script will post the status of your backup task to a Slack channel.

ifttt_maker.sh
This postflight script will post an IFTTT Maker Event of the status of your backup task.

I have a full-volume backup in a folder or a disk image, but I don't have a bootable backup. How can I restore everything?

$
0
0
Product: 
ccc5

CCC makes bootable backups specifically to avoid this kind of situation. When you have a bootable backup, you simply boot from that, then restore everything to a replacement disk or the original disk. One step, minimal time, couldn't be easier. Occasionally people get into this sticky situation though -- I have a backup of everything in a disk image or in a folder on the backup volume, there's a clean installation of macOS on my replacement disk, now how do I get everything back to the way that it was before?

The first thing that you need to do is make a boot volume that is not the volume you want to restore to. Once you have done that, you can boot from that volume and then do a complete restore of your backup to the replacement disk. There are several options for how and where you create this other bootable volume. For example, you could install macOS onto a thumb drive, or you could use CCC to clone your clean installation of macOS to a thumb drive. You could also create a new partition on your replacement disk and clone the fresh installation of macOS to that. The steps below attempt to make very few assumptions about the resources you'll have in this scenario: a) You have a fresh installation of macOS on a hard drive and b) you have your backup in a folder or disk image on some other disk. Given those assumptions, here is how we recommend that you proceed.

Create a new partition on your replacement disk

  1. Open the Disk Utility application and click on the disk icon that represents your internal hard drive. Don't click on the Macintosh HD icon, click on the one above that.
  2. Click on the Partition tab.
  3. Click on the + button.
  4. Set the size of the new partition to 20GB and name it something like Rescue.
  5. Click the Apply button.

This video describes the same procedure (albeit in a slightly different context).

Clone your fresh installation of macOS to the Rescue volume

  1. Open Carbon Copy Cloner and create a new task.
  2. Choose your current startup disk as the source.
  3. Choose the Rescue volume as the destination.
  4. If you aren't working from a fresh installation of macOS, choose Some files... from the Clone popup menu and take a moment to exclude third-party applications from the list of items to be copied, as well as any large items in your home folder (e.g. /Users/yourname/Music).
  5. Click the Clone button.

Boot from the Rescue volume and restore your data to the replacement disk

  1. Open the Startup Disk Preference Pane, set the Rescue volume as the startup disk, then click on the Restart button.
  2. Once restarted from the Rescue volume, attach the backup volume to your Mac and open the Carbon Copy Cloner application.
  3. If your data is backed up in a folder, choose Choose a folder... from the Source selector and select that folder as the source. Otherwise, choose Restore from a disk image... and locate your backup disk image.
  4. Choose your Macintosh HD volume as the destination.
  5. Verify that CCC's SafetyNet feature is enabled.
  6. Click the Clone button.

Reboot from your restored volume and clean up

  1. Open the Startup Disk Preference Pane, set the restored volume as the startup disk, then click on the Restart button.
  2. Open the Disk Utility application and click on the disk icon that represents your internal hard drive.
  3. Click on the Partition tab.
  4. Click on the Rescue volume, then click on the - button to delete that volume.
  5. Click the Apply button.

Finally, make a new backup to the root of a locally-attached hard drive so you'll have a bootable backup from here forward.

Backing up to/from network volumes and other non-macOS-formatted volumes

$
0
0
Product: 
ccc5

In addition to backing up to volumes formatted with the macOS standard HFS+ or APFS format (collectively referred to as "macOS-formatted" from here forward), CCC can copy user data files to network volumes (e.g. AFP and SMB via macOS and Windows File Sharing) and to other non-macOS-formatted volumes such as FAT32. Non-macOS-formatted volumes are presented in CCC's Source and Destination selectors in the same manner as macOS-formatted volumes, so there are no special steps required for backing up to or from these filesystems. However, these filesystems offer limited support for macOS-filesystem features, so special consideration must be given when backing up to these volumes. In general, you can reasonably expect to back up user data — files that belong to your user account — to and from non-macOS-formatted volumes. Specific considerations are noted below.

You can mount network volumes in the Finder, or via the Mount a network volume... option in CCC's Utilities menu. Please note that network volumes mounted by third-party software is generally not supportable.

CCC will only back up system files to locally-attached macOS-formatted filesystems

macOS can only be installed on a macOS-formatted volume. This requirement is also carried to a backup volume. When system files are copied to non-macOS filesystems, important metadata are unavoidably lost, resulting in files that cannot be restored to their original functionality. In short, you cannot restore a functional installation of macOS from a backup stored on a non-macOS volume. To prevent any misunderstandings about this result, CCC will exclude system files from a backup task if the destination is not a locally-attached, macOS-formatted volume. Likewise, CCC will not copy system files from a network volume, e.g. if you were to mount the startup disk of another Mac, the system files on that network volume cannot be copied in a meaningful way.

Note that the "locally-attached" caveat is an important distinction. Even if your destination volume is macOS-formatted, if it is attached to an Airport Base Station (for example), then you're accessing the volume via file sharing. If you open the Get Info panel for the volume, you will see that the volume format is "AppleShare" or "SMB", not HFS+ or APFS. It is not possible to update an OS backup on a network volume. If you would like to maintain a backup of macOS on a network volume, you can back up to a disk image on the network volume. See the related documentation below for additional information on this backup strategy.

Related Documentation

Ownership and permissions concerns

Network filesystems pose some interesting challenges in regards to preserving ownership and permissions. When you connect to another computer that is hosting a shared volume, you usually authenticate by providing a username and password. The account whose credentials you provide is an account on that other computer, and it is this account's privileges that determine what access you have to files and folders on the shared volume. Additionally, any files that are copied to the shared volume will be owned by that user account, regardless of the ownership of those files on the source volume. This is not a behavior specific to CCC, it is simply the nature of network filesystems.

An example will be very helpful in understanding the implications of this behavior. Suppose Sally would like to back up some Movies from her Mac's home folder to another Mac shared by Bob and Joe. On Sally's Mac, there is a user account named "sally". On Bob and Joe's Mac, File Sharing has been enabled in the Sharing Preference Pane, and there are two user accounts, "joe" and "bob". Bob has attached an external hard drive named "Backup" to his Mac that he and Joe have been using for backup, and he has created a folder named "Sally's Movies" on this volume to which Sally will copy files. Sally does the following to connect to Bob and Joe's Mac:

  1. In the Finder, open a new window, then click on "Bob and Joe's Mac" in the Shared section of the sidebar.
  2. Click on the Connect as... button.
  3. In the authentication dialog, provide Bob's username and password, then click on the Connect button.
  4. Choose the "Backup" volume from the list of shared volumes.

The Backup volume now appears on Sally's Desktop, and in CCC's Destination selector in the Network Volumes section. Next, Sally chooses Choose a folder... from CCC's Source selector and locates the folder of movies that she would like to copy to Bob and Joe's Mac. She then chooses Choose a folder... from the Destination selector and locates the "Sally's Movies" folder on the Backup network volume. She clicks the Clone button and the Movies are backed up.

Later that day, Joe is using his computer and he notices that he can see some of the movies in the "Sally's Movies" folder, but some of the subfolders have a universal "No access" badge and he cannot view those folders' contents. This occurred for two reasons:

  1. Sally mounted the network volume using Bob's credentials, so the files and folders created when she copied her files to the Backup volume are now owned by Bob's user account.
  2. Some of the folders on Sally's computer prevented access by "other" users.

As a result, the folders on the Backup volume are owned by Bob and some of them limit access to other users (Joe in this case). Joe asks Sally about this and she decides to try copying some of the movies to one of Joe's folders on the backup volume. When she chooses Choose a folder... from CCC's Destination menu, however, she sees the same universal "No Access" badge on Joe's folder. Sally can't copy files to this folder (nor can CCC) because the Backup volume was mounted using Bob's credentials, and Joe's backup folder on the backup volume happened to be inaccessible to Bob. Sally unmounts the backup volume and reconnects to it using Joe's credentials, and she is then able to copy files to Joe's private folder.

What can I do when there are permissions or ownership issues that prevent CCC from copying items to/from or updating items on a network volume?

First, it is important to keep in mind that no application can modify the ownership of a file or folder on a network share. Ownership changes must be applied on the computer or device that is hosting the network volume. Additionally, permissions changes can only be made to files and folders owned by the user whose credentials were used to mount the network volume. For this reason, it is generally easier to apply both ownership and permissions changes on the computer or device hosting the network volume.

If the computer hosting the network volume is a Mac, you can modify ownership and permissions in the Get Info panel for that folder (on the Mac hosting the network volume):

  1. In the Finder, click on the folder whose permissions or ownership you would like to change.
  2. Choose Get Info from the File menu.
  3. In the Sharing & Permissions section at the bottom, click on the lock icon to make the permissions editable.
  4. To change permissions, choose Read & Write from the popup menu next to the owner of the file or folder.
  5. If the owner of the item is not the user account that you use to connect to this Macintosh, click on the + button
  6. In the window that appears, select the user account that you use to connect to this Macintosh, then click the Select button.
  7. Set the access privileges to Read & Write.
  8. Click on the Gear menu and choose to apply the change to enclosed items.
  9. Try your backup task again.

If the computer or device that is hosting the network volume is not a Macintosh, consult that device's documentation to learn how to change permissions and ownership of files and folders.

Alternative #1: If you have mounted the network volume with Guest privileges, unmount and remount the network volume using the credentials of an account on the machine or device hosting the network volume.

Alternative #2: You can create a new folder on the shared volume and specify that folder as the destination in CCC by choosing Choose a folder... from the Destination selector.

Alternative #3: You can have CCC create a disk image on the network volume rather than copying files directly to a folder. When CCC creates a disk image on the destination, the disk image is formatted as HFS+ and attached locally, so CCC can preserve the permissions and ownership of the files that you are copying to it.

Limitations of non-macOS-formatted filesystems

When you choose a non-macOS-formatted volume as a destination, CCC's Cloning Coach will proactively warn you of any compatibility issues between the source and destination volumes. You can view the Cloning Coach's warnings by clicking on the yellow caution button in the Task Plan header. If you have selected a source and destination volume, and the caution button is not present, then there are no configuration concerns.

Support for third-party filesystems

CCC offers limited support for third-party filesystems, such as those provided by FUSE for OS X. Due to the large number of filesystems that can be provided by FUSE, CCC provides generic support for these "userland" filesystems rather than specific support. CCC takes a best effort approach by determining the capabilities of the source and destination filesystems, warns of potential incompatibilities, then presents only unexpected error conditions that arise during a backup.

Backing up to FUSE volumes mounted without the allow_root flag is not currently supported (e.g. Google Drive, BitCasa). Please contact the vendor of your proprietary filesystem to ask that they offer the ability to mount the volume with the allow_root flag if you would like to use that volume as a source or destination to a CCC backup task.

Google Drive File Stream is a special case. We've seen odd behavior when selecting Google Drive File Stream volumes as a whole as the source or destination for a task – CCC is unable to read the root folder during a backup task. CCC explicitly disallows that configuration. Selecting a subfolder on the Google Drive volume does work, though, and CCC allows that configuration. There is one other notable concern with Google Drive File Stream – Google Drive will download files when they are accessed if they do not currently reside on your Mac's hard drive. If you specify a Google Drive folder as the source to a backup task, you should anticipate that cloud-only files may be downloaded to your Mac during the backup task. That behavior lies outside of CCC's purview, it cannot be modified with a CCC task setting.

The Western Digital MyCloud Home NAS device is another special case. The "Home" model of this NAS device requires the use of WD-proprietary software to access the storage securely; direct access to the storage via SMB is only available with Guest privileges. Users report that performance of the storage while using WD's software is subpar in comparison to Guest access via SMB, and other users have reported to us that macOS is unable to create or mount disk images on the storage when mounted via Western Digital's software. When you mount WD MyCloud Home NAS storage using WD's software, the volume is vended by a 'kddfuse' filesystem. CCC won't allow these volumes as a source or destination device. To back up to a WD MyCloud Home NAS, mount the storage via SMB in the Finder instead. Be sure to choose the "Guest" user option when prompted to authenticate, because the MyCloud Home device doesn't support authenticated access via SMB.

Writable NTFS filesystems

We have seen several reports of problems copying large amounts of data (e.g. > 4GB) to writable NTFS filesystems. In most cases, the underlying software that vends the filesystem (e.g. Tuxera, Paragon, and others) crashes and the volume is rendered "mute". While it may be possible to complete a backup to these filesystems in chunks (e.g. 4GB at a time), we recommend using a more reliable, writable filesystem if you encounter these problems.

Related Documentation

Backing up a Boot Camp installation of Windows

CCC can back up the user data on a Boot Camp volume, but it cannot make an installation of Windows bootable. If your goal is to back up your user data on the Boot Camp volume, CCC will meet your needs. If you're looking to migrate your Boot Camp volume to a new hard drive, you might consider an alternative solution such as WinClone, or one of the commercial virtualization solutions that offer a migration strategy from Boot Camp.

Backing up the contents of an NTFS volume

The NTFS filesystem supports "named streams", a feature that is comparable to extended attributes on macOS-formatted volumes and many other filesystems. Unlike extended attributes, however, there is no limit to the amount of data that can be stuffed into NTFS named streams (aside from standard file size limitations). Extended attributes on macOS have a 128KB size limit. As a result, any attempts to copy a named stream larger than 128KB to a non-NTFS filesystem will fail. CCC will copy the standard file data just fine, but will not copy named streams larger than 128KB. CCC's Cloning Coach will warn of this kind of incompatibility, and any errors related to this limitation will be logged to the CCC log file, however these errors will not be raised to your attention.

This limitation applies when copying files between volumes on Windows as well, so application developers tend to use named streams only for data that can be regenerated (e.g. thumbnail icons, summary or statistical information), not for storage of irreplaceable user data.

NAS service failures can lead to unreliable backups

Access to the contents of a network volume is provided by an application that runs on another computer or Network Attached Storage (NAS) device. Every NAS device and operating system has its own vendor-specific version of the file sharing application, so we occasionally see problems with some NAS devices that don't occur on others. Problems can be minor, such as being unable to set file flags (e.g. hidden, locked) on an item, or more significant, like not being able to store or retrieve resource forks. When these problems are encountered during a backup task, CCC will copy as many files and as much data as possible, then offer a report on the items or attributes that could not be copied.

When you encounter an error caused by the file sharing service that hosts your network volume, there are a few workarounds that you can try to avoid the errors:

  • Eject the network volume on your Mac, then restart the computer or NAS device that is hosting the network volume. Reconnect to the network volume and try the backup task again.
  • Connect to the network volume using a different protocol. A different application is responsible for each protocol, so if the AFP service on your server has a bug, connecting to the SMB service may work more reliably (and vice versa). Choose Connect to server from the Finder's Go menu, then specify "smb://servername.local/volume " or "afp://servername.local/volume " to connect to the server using a different protocol. If you are unsure which protocol you are currently using, click on the mounted volume in the Finder, then choose Get Info from the Finder's File menu to find out.
  • If the errors persist when connecting to the network volume via both AFP and SMB, and restarting the file server does not change the outcome, try backing up to a disk image on the network volume instead.

Performing actions Before and After the backup task

$
0
0
Product: 
ccc5

Often when you have a backup task that runs on a scheduled basis, there are associated tasks that you would like to perform before or after files are actually copied. CCC offers the option to run shell scripts before and after a backup task, unmount or set the destination as the startup disk, run another CCC backup task, and power management options such as restart and shutdown. If you would like to perform any of these pre or post clone tasks, click the Advanced Settings button below CCC's Source selector.

Mounting the source or destination volume before a backup task begins

Without any additional configuration, CCC will attempt to mount your source and destination volumes before a backup task begins. This applies to many different volume types — ordinary volumes on locally-attached hard drives, disk images, network volumes, encrypted volumes – even encrypted volumes on remote Macs. If your source or destination volume is on a disk that is physically attached to your Mac (e.g. via Firewire, Thunderbolt, or USB), but it is not mounted, CCC can "see" that device and will attempt to mount it. If your source or destination is a network volume, CCC will obtain the credentials that you use to mount that device when you create the backup task, and will use those credentials to mount the volume before the task begins.

This also applies for nested volumes. For example, suppose you are backing up to a disk image on a network volume. CCC will first attempt to mount the network volume, then it will attempt to mount the disk image. Likewise, suppose you have a task configured to back up the contents of a folder on an encrypted volume. If you have saved the encrypted volume's passphrase in CCC's keychain, CCC will unlock and mount the encrypted volume before the backup task begins.

CCC's attempts to mount the source and destination volumes occur automatically before any other tasks, including pre clone shell scripts (described below), therefore it is not necessary to implement a shell script to pre-mount the source or destination.

Little Snitch may prevent the automated mounting of network volumes

If you're using Little Snitch to monitor and filter your inbound and outbound network traffic, you may find that CCC has trouble automatically mounting a network volume. If you run into this problem, configure Little Snitch to allow network access to the NetAuthSysAgent system service. NetAuthSysAgent is the macOS system service that fulfills application requests to mount network volumes.

SafetyNet Pruning

SafetyNet pruning is covered in more detail in this section of CCC's documentation.

Destination volume options

If you would like CCC to unmount your destination volume at the end of the backup task, choose Unmount the destination volume from the Destination volume management menu. If your destination is a folder, the text will be Unmount the underlying volume. If the destination is a disk image, CCC always unmounts the disk image volume, so this setting refers to the underlying physical volume upon which the disk image resides.

CCC will not forcefully unmount the destination volume. If an application has open files on the destination volume, CCC's attempt to unmount the volume will fail. CCC does not report this as an error, though it will make a note of it in the Task History window.

Yosemite users have an option to set the destination volume as the startup disk. Starting in El Capitan, however, Apple's System Integrity Protection prevents third-party applications from changing the startup disk setting. We do not recommend disabling System Integrity Protection to make this feature work, rather we recommend that you use the Startup Disk Preference Pane to change the startup disk selection.

Power management options

By default, at the end of a backup task, CCC will not perform any power management tasks. Instead, the system will perform as defined by the settings in the Energy Saver preference pane. For example, if you have the system configured to idle sleep after 20 minutes, the system will go to sleep if there hasn't been any user activity in the last 20 minutes. CCC activity is not considered user activity, so often the system will go to sleep immediately after CCC finishes a backup task.

If you choose one of the options from the Power management menu, CCC will reboot or shut down your Mac when the backup task finishes. The reboot and shutdown options are not forceful. If you have a document open with unsaved modifications, for example, the application would prompt you to save the document. If a save dialog is not attended to, the shutdown or reboot request will time out.

Turn off the computer if it was previously off

If your backup task is scheduled to run on a regular basis, this option will be enabled in the Power Management popup menu. This option is applicable if you would like to have CCC shut down your Mac at the end of the task, but only in cases where the Mac was booted at the task's scheduled run time. If your backup task runs when the system has been on for a while or has been sleeping, CCC will not shut down the Mac when using this option.

Power Management options are ignored in some cases

Power management options will not be applied to backup tasks that are cancelled (e.g. you click the Stop button). Additionally, power management tasks will not be applied if other CCC backup tasks are running or queued to run immediately after the current task finishes running. If your task is running as part of a Task Group, power management options will be deferred to when all tasks within the group have completed.

Power Management options are applied regardless of task success

Power management options will be applied whether the backup task completes successfully or not. If you prefer for a backup task to perform the power management action only when the backup task exits without error, see the pm_on_success.sh postflight script below.

Run another backup task (task chaining)

If you have more than one CCC backup task configured, the other tasks will be listed in this popup menu. To create a task chain (e.g. to run tasks sequentially), simply choose one of these tasks to have that task run automatically after the current task finishes. Tasks run in this manner will start after the current task has finished completely. Chained tasks will run regardless of the exit status of a preceding task in the chain, e.g. if the first task reports errors or fails to run at all, the second task will still run.

Running shell scripts before and after the backup task

If there is functionality that you need that does not exist within CCC, pre and post clone shell scripts may be the solution for you. Pre clone shell scripts run after CCC has performed "sanity" checks (e.g. are the source and destination volumes present, is connectivity to a remote Macintosh established) but before copying files. If you need your preflight script to run before CCC does the source/destination sanity checks, specify the preflight script as a global preflight script in the Advanced section of CCC's Preferences window. Note that global preflight scripts run prior to every task, they are not task-specific. Also, please bear in mind that CCC automatically attempts to mount the source and destination at the beginning of the task, you should not be implementing a shell script to achieve that functionality. If you're having trouble with CCC pre-mounting the source and destination, please ask us for help rather than attempt to address the issue with a preflight shell script.

Post-clone shell scripts run after CCC has finished copying files and performing its own internal cleanup, but before unmounting any volumes.

CCC passes several parameters to pre and post clone shell scripts. For example, the following shell script:

#!/bin/sh

echo "Running $0"
echo `date`
echo "Source: $1"
echo "Destination: $2"
echo "Third argument: $3" # Exit status for post-clone scripts, underlying volume path for a disk image for pre-clone scripts
echo "Fourth argument: $4" # Destination disk image path, if applicable


Would produce the following output (you can redirect this output to a file of your own specification) if implemented as a post clone script:


Running /Library/Application Support/com.bombich.ccc/Scripts/postaction.sh
Wed Oct 8 21:55:28 EDT 2014
Source: /
Destination: /Volumes/Offsite Backup
Third argument: 0
Fourth argument:

First parameter

The path to the source volume or folder. If the source volume is APFS-formatted, then this path will usually be the path to a temporary, read-only snapshot of the source (or the path to the source folder on the temporary, read-only snapshot). On macOS Catalina and later, if the source volume is a System volume, CCC will send the path to a snapshot of the Data sibling of the source as the first parameter.

Second parameter

The path to the destination volume or folder. If the destination is a disk image, this is the path to the mounted disk image. On macOS Catalina and later, if the destination volume is a System volume, CCC will send the path to the Data sibling of the destination as the second parameter, e.g. "/Volumes/Clone - Data".

Third parameter

  • Pre clone script: The underlying mountpoint for the volume that holds the destination disk image, if applicable.
  • Post clone script: The exit status of the file copying phase of the backup task.

Fourth parameter

The path to the destination disk image, if applicable.

If your pre clone script exits with a non-zero exit status, it will cause CCC to abort the backup task. This can be used to your advantage if you want to apply preconditions to your backup operation. If you want to be certain that errors in your pre clone shell script never cause the backup task to be aborted, add "exit 0" to the end of your script. If you would like that script to silently cancel the backup task, add "exit 89" to the end of the script. If the script is a global preflight script (specified in the Advanced section of CCC's Preferences window), you can add "exit 104" to the end of the script to cancel the backup task and to avoid recording a Task History event.

The post clone script will run whether the backup task exits successfully or not. If your script should behave differently depending on the result of the task, you can test whether the third parameter is zero (an exit status of "0" means the task ended successfully). For example:

#!/bin/sh

source="$1"
dest="$2"
exitStatus=$3

if [ "$exitStatus" = "0" ]; then
    # foo
else
    # bar
    # Note: Do not assume that $source and $dest are populated
    # These will be empty if source or destination validation fails
fi

If your postflight script exits with a non-zero exit status, CCC will not report this as a failure of the backup task. The failure will be noted in the Task History window, however.

AppleScripts are not supported

You cannot specify an AppleScript as a pre or post clone script, CCC currently only supports running shell scripts.

Shell scripts require a shell interpreter line

CCC does not assume a default shell environment when running your pre or postflight script. Not doing so gives users a great deal of flexibility; they can choose to write their scripts in any shell or programming language (e.g. bash, python, perl, ruby, C). For CCC to execute a shell script as an application, though, the system needs to know what shell should be used to interpret the script, and that value needs to be defined in your shell script. This is done simply by placing a shell interpreter line at the top of the file, e.g. #!/bin/sh.

Security implications of pre and post clone shell scripts

CCC's pre and post clone shell scripts are executed as the System Administrator (aka "root"). To prevent unauthorized modifications to your shell scripts, we recommend that you restrict the ownership and permissions of these scripts and to the folder in which they are contained. The parent folder and scripts should be writable only by the root user. For example, running the following in the Terminal application would secure any shell scripts located in the default location for pre and post clone scripts:

sudo chown -R root:wheel /Library/Application\ Support/com.bombich.ccc/Scripts
sudo chmod -R 755 /Library/Application\ Support/com.bombich.ccc/Scripts

To further enhance the security of your pre and postflight scripts, CCC will require that scripts stored in the default location are owned by the root user and writable only by the root user, and that the Scripts folder itself is also owned and writable only by the root user. If a script that resides within the default Scripts folder does not meet these requirements, CCC will refuse to execute that script and the associated task will report an error.

After copying scripts into CCC's Scripts folder or making changes to those scripts, you can choose "Secure CCC's Scripts folder" from CCC's Utilities menu to correct any ownership or permissions concerns. Please note that these additional security requirements are only applied to scripts stored within the /Library/Application Support/com.bombich.ccc/Scripts folder. If you prefer to manage the security of your shell scripts on your own, you may store them in another location.

Example pre and post clone shell scripts

To use any of these example scripts, download the script and place it somewhere on your startup disk. By default, CCC looks in /Library/Application Support/com.bombich.ccc/Scripts.

parallels_pause.sh
This is a pre clone script that you can use to pause all currently-running Parallels VM containers. This script will also retain state information that can be read by the corresponding parallels_start.sh post clone script to resume these VMs after the backup task has completed. Note: This script relies on command-line tools offered only in Parallels Desktop for Mac Pro or Business Edition. 

parallels_start.sh
This post clone script will resume any Parallels VM containers that were suspended by the parallels_pause.sh pre clone script. Note: This script relies on command-line tools offered only in Parallels Desktop for Mac Pro or Business Edition.

play_sound.sh
If you want to play a unique sound, use this script. You can plug in the path to any audio file of your liking or try one of the examples included.

eject_source_and_destination.sh
CCC's option to automatically unmount the destination volume is a volume-level task, not a device task. It's also limited to the destination. If you want to eject the destination device, or if you want to unmount or eject the source, use this post clone script instead. Note that ejecting a device will unmount all volumes on the device. Also note that this example script adds a 60-second delay to accommodate macOS's desire to automatically regenerate various cache files. This delay can be adjusted if necessary by editing the script.

pm_on_success.sh
This post clone script will perform the requested power management option (e.g. shutdown, restart, sleep) at the end of the backup task if the backup task completes without errors. Use this in lieu of one of the Power Management postflight options if you prefer the power management action does not occur when a task ends with errors (e.g. if the destination volume is missing).

quit_application.sh and open_application.sh
This pair of scripts can be used to quit and open an application before and after the backup task. Open these scripts in a text editor to define the application that should be quit or opened.

post_to_slack.sh
This postflight script will post the status of your backup task to a Slack channel.

ifttt_maker.sh
This postflight script will post an IFTTT Maker Event of the status of your backup task.

Working with FileVault Encryption

$
0
0
Product: 
ccc5

CCC is fully qualified for use with FileVault-protected volumes (HFS+ and APFS). CCC offers some advice around enabling encryption in the Disk Center.

Enabling encryption on a volume that contains (or will contain) an installation of macOS

If your goal is to create a bootable, encrypted backup, use the following procedure:

  1. Follow CCC's documentation to properly format the destination volume. Do not format the volume as encrypted. Choose APFS if your Mac is a T2 Mac (e.g. iMacPro, 2018 MacBookPro; see the full list here).
  2. Use CCC to back up your startup disk to the unencrypted destination volume.
  3. Click on the destination volume in CCC's Disk Center, then click the Recovery HD button to create a Recovery HD volume. Note: You must be logged in to an administrator account to perform this step. [This step is unnecessary if your destination is an APFS-formatted volume]
  4. Open the Startup Disk preference pane and restart your Mac from backup volume.
  5. Enable FileVault encryption in the Security & Privacy preference pane of the System Preferences application.
  6. Reboot your Mac (it will reboot from the backup volume).
  7. Open the Startup Disk preference pane and restart your Mac from your production startup volume.
  8. Configure CCC for regular backups to your encrypted backup volume.

Note: You do not have to wait for the conversion process to complete before using the backup disk. Additionally, you do not have to remain booted from the backup disk for the conversion process to complete. You can simply enable FileVault encryption, then immediately reboot from your primary startup disk and the conversion process will carry on in the background. Encryption will continue as long as the backup disk is attached. macOS doesn't offer a convenient method to see conversion progress, but you can type diskutil apfs list (or diskutil cs list if the applicable volume is HFS+ formatted) in the Terminal application to see conversion progress. Some users have found that conversion may not resume until you log in to an admin account while booted from your production startup volume, so try that if conversion appears to be stalled.

What if I don't want my personal data to ever be on the destination in unencrypted form?

Enabling FileVault on the destination means that the volume starts out unencrypted, and then over the course of several hours the data is encrypted in place. If the encryption conversion process completes successfully, then for most intents and purposes, no trace of the unencrypted data will be left on that disk. There are some caveats however. If your backup volume is an SSD, and if you delete files from the SSD prior to enabling encryption, then the SSD may automatically move the not-yet-encrypted underlying blocks out of rotation (for wear leveling), and those data could be recoverable by experts. Likewise, if the conversion process fails for any reason, then the data on that disk is potentially recoverable. If either of these scenarios is not acceptable, then we recommend that you exclude any sensitive data from the initial backup task. Don't exclude your whole home folder — you must include at least one folder from your home directory so that you can log in to that account on the backup. After you have booted from the backup volume and enabled FileVault, you can then reboot from the production startup disk, remove the exclusions from your backup task, then run the backup task again to copy the remainder of your data. Any data that is copied to a volume that is in the midst of encryption conversion will be encrypted immediately.

Enabling encryption on a volume that will not contain an installation of macOS

If your backup volume won't be a bootable backup of macOS, simply right-click on that volume in the Finder and choose the option to encrypt the volume. If your Mac is running macOS High Sierra or later, please note that macOS will convert an HFS+ formatted volume to APFS when you enable encryption in this manner.

Finder option

Related Documentation

Performing actions Before and After the backup task

$
0
0
Product: 
ccc5

Often when you have a backup task that runs on a scheduled basis, there are associated tasks that you would like to perform before or after files are actually copied. CCC offers the option to run shell scripts before and after a backup task, unmount or set the destination as the startup disk, run another CCC backup task, and power management options such as restart and shutdown. If you would like to perform any of these pre or post clone tasks, click the Advanced Settings button below CCC's Source selector.

Mounting the source or destination volume before a backup task begins

Without any additional configuration, CCC will attempt to mount your source and destination volumes before a backup task begins. This applies to many different volume types — ordinary volumes on locally-attached hard drives, disk images, network volumes, encrypted volumes – even encrypted volumes on remote Macs. If your source or destination volume is on a disk that is physically attached to your Mac (e.g. via Firewire, Thunderbolt, or USB), but it is not mounted, CCC can "see" that device and will attempt to mount it. If your source or destination is a network volume, CCC will obtain the credentials that you use to mount that device when you create the backup task, and will use those credentials to mount the volume before the task begins.

This also applies for nested volumes. For example, suppose you are backing up to a disk image on a network volume. CCC will first attempt to mount the network volume, then it will attempt to mount the disk image. Likewise, suppose you have a task configured to back up the contents of a folder on an encrypted volume. If you have saved the encrypted volume's passphrase in CCC's keychain, CCC will unlock and mount the encrypted volume before the backup task begins.

CCC's attempts to mount the source and destination volumes occur automatically before any other tasks, including pre clone shell scripts (described below), therefore it is not necessary to implement a shell script to pre-mount the source or destination.

Little Snitch may prevent the automated mounting of network volumes

If you're using Little Snitch to monitor and filter your inbound and outbound network traffic, you may find that CCC has trouble automatically mounting a network volume. If you run into this problem, configure Little Snitch to allow network access to the NetAuthSysAgent system service. NetAuthSysAgent is the macOS system service that fulfills application requests to mount network volumes.

SafetyNet Pruning

SafetyNet pruning is covered in more detail in this section of CCC's documentation.

Destination volume options

If you would like CCC to unmount your destination volume at the end of the backup task, choose Unmount the destination volume from the Destination volume management menu. If your destination is a folder, the text will be Unmount the underlying volume. If the destination is a disk image, CCC always unmounts the disk image volume, so this setting refers to the underlying physical volume upon which the disk image resides.

CCC will not forcefully unmount the destination volume. If an application has open files on the destination volume, CCC's attempt to unmount the volume will fail. CCC does not report this as an error, though it will make a note of it in the Task History window.

Yosemite users have an option to set the destination volume as the startup disk. Starting in El Capitan, however, Apple's System Integrity Protection prevents third-party applications from changing the startup disk setting. We do not recommend disabling System Integrity Protection to make this feature work, rather we recommend that you use the Startup Disk Preference Pane to change the startup disk selection.

Power management options

By default, at the end of a backup task, CCC will not perform any power management tasks. Instead, the system will perform as defined by the settings in the Energy Saver preference pane. For example, if you have the system configured to idle sleep after 20 minutes, the system will go to sleep if there hasn't been any user activity in the last 20 minutes. CCC activity is not considered user activity, so often the system will go to sleep immediately after CCC finishes a backup task.

If you choose one of the options from the Power management menu, CCC will reboot or shut down your Mac when the backup task finishes. The reboot and shutdown options are not forceful. If you have a document open with unsaved modifications, for example, the application would prompt you to save the document. If a save dialog is not attended to, the shutdown or reboot request will time out.

Turn off the computer if it was previously off

If your backup task is scheduled to run on a regular basis, this option will be enabled in the Power Management popup menu. This option is applicable if you would like to have CCC shut down your Mac at the end of the task, but only in cases where the Mac was booted at the task's scheduled run time. If your backup task runs when the system has been on for a while or has been sleeping, CCC will not shut down the Mac when using this option.

Power Management options are ignored in some cases

Power management options will not be applied to backup tasks that are cancelled (e.g. you click the Stop button). Additionally, power management tasks will not be applied if other CCC backup tasks are running or queued to run immediately after the current task finishes running. If your task is running as part of a Task Group, power management options will be deferred to when all tasks within the group have completed.

Power Management options are applied regardless of task success

Power management options will be applied whether the backup task completes successfully or not. If you prefer for a backup task to perform the power management action only when the backup task exits without error, see the pm_on_success.sh postflight script below.

Run another backup task (task chaining)

If you have more than one CCC backup task configured, the other tasks will be listed in this popup menu. To create a task chain (e.g. to run tasks sequentially), simply choose one of these tasks to have that task run automatically after the current task finishes. Tasks run in this manner will start after the current task has finished completely. Chained tasks will run regardless of the exit status of a preceding task in the chain, e.g. if the first task reports errors or fails to run at all, the second task will still run.

Running shell scripts before and after the backup task

If there is functionality that you need that does not exist within CCC, pre and post clone shell scripts may be the solution for you. Pre clone shell scripts run after CCC has performed "sanity" checks (e.g. are the source and destination volumes present, is connectivity to a remote Macintosh established) but before copying files. If you need your preflight script to run before CCC does the source/destination sanity checks, specify the preflight script as a global preflight script in the Advanced section of CCC's Preferences window. Note that global preflight scripts run prior to every task, they are not task-specific. Also, please bear in mind that CCC automatically attempts to mount the source and destination at the beginning of the task, you should not be implementing a shell script to achieve that functionality. If you're having trouble with CCC pre-mounting the source and destination, please ask us for help rather than attempt to address the issue with a preflight shell script.

Post-clone shell scripts run after CCC has finished copying files and performing its own internal cleanup, but before unmounting any volumes.

CCC passes several parameters to pre and post clone shell scripts. For example, the following shell script:

#!/bin/sh

echo "Running $0"
echo `date`
echo "Source: $1"
echo "Destination: $2"
echo "Third argument: $3" # Exit status for post-clone scripts, underlying volume path for a disk image for pre-clone scripts
echo "Fourth argument: $4" # Destination disk image path, if applicable


Would produce the following output (you can redirect this output to a file of your own specification) if implemented as a post clone script:


Running /Library/Application Support/com.bombich.ccc/Scripts/postaction.sh
Wed Oct 8 21:55:28 EDT 2014
Source: /
Destination: /Volumes/Offsite Backup
Third argument: 0
Fourth argument:

First parameter

The path to the source volume or folder. If the source volume is APFS-formatted, then this path will usually be the path to a temporary, read-only snapshot of the source (or the path to the source folder on the temporary, read-only snapshot). On macOS Catalina and later, if the source volume is a System volume, CCC will send the path to a snapshot of the Data sibling of the source as the first parameter.

Second parameter

The path to the destination volume or folder. If the destination is a disk image, this is the path to the mounted disk image. On macOS Catalina and later, if the destination volume is a System volume, CCC will send the path to the Data sibling of the destination as the second parameter, e.g. "/Volumes/Clone - Data".

Third parameter

  • Pre clone script: The underlying mountpoint for the volume that holds the destination disk image, if applicable.
  • Post clone script: The exit status of the file copying phase of the backup task.

Fourth parameter

The path to the destination disk image, if applicable.

If your pre clone script exits with a non-zero exit status, it will cause CCC to abort the backup task. This can be used to your advantage if you want to apply preconditions to your backup operation. If you want to be certain that errors in your pre clone shell script never cause the backup task to be aborted, add "exit 0" to the end of your script. If you would like that script to silently cancel the backup task, add "exit 89" to the end of the script. If the script is a global preflight script (specified in the Advanced section of CCC's Preferences window), you can add "exit 104" to the end of the script to cancel the backup task and to avoid recording a Task History event.

The post clone script will run whether the backup task exits successfully or not. If your script should behave differently depending on the result of the task, you can test whether the third parameter is zero (an exit status of "0" means the task ended successfully). For example:

#!/bin/sh

source="$1"
dest="$2"
exitStatus=$3

if [ "$exitStatus" = "0" ]; then
    # foo
else
    # bar
    # Note: Do not assume that $source and $dest are populated
    # These will be empty if source or destination validation fails
fi

If your postflight script exits with a non-zero exit status, CCC will not report this as a failure of the backup task. The failure will be noted in the Task History window, however.

AppleScripts are not supported

You cannot specify an AppleScript as a pre or post clone script, CCC currently only supports running shell scripts.

Shell scripts require a shell interpreter line

CCC does not assume a default shell environment when running your pre or postflight script. Not doing so gives users a great deal of flexibility; they can choose to write their scripts in any shell or programming language (e.g. bash, python, perl, ruby, C). For CCC to execute a shell script as an application, though, the system needs to know what shell should be used to interpret the script, and that value needs to be defined in your shell script. This is done simply by placing a shell interpreter line at the top of the file, e.g. #!/bin/sh.

Shell scripts run as the root user

CCC's pre and post clone shell scripts are executed as the System Administrator (aka "root"). As such, any references to your own shell environment will be invalid. When referencing tools that lie outside of the default $PATH, be sure to either specify the full path to the item (e.g. /usr/local/bin/foo), or export your own $PATH at the top of your script. Likewise, if you make relative references to files (e.g. ~/Desktop/foo.log), those files will be created in the root user account, e.g. /var/root/Desktop/foo.log. Use absolute paths for more reliable results.

Security implications of pre and post clone shell scripts

To prevent unauthorized modifications to your shell scripts, we recommend that you restrict the ownership and permissions of these scripts and to the folder in which they are contained. The parent folder and scripts should be writable only by the root user. For example, running the following in the Terminal application would secure any shell scripts located in the default location for pre and post clone scripts:

sudo chown -R root:wheel /Library/Application\ Support/com.bombich.ccc/Scripts
sudo chmod -R 755 /Library/Application\ Support/com.bombich.ccc/Scripts

To further enhance the security of your pre and postflight scripts, CCC will require that scripts stored in the default location are owned by the root user and writable only by the root user, and that the Scripts folder itself is also owned and writable only by the root user. If a script that resides within the default Scripts folder does not meet these requirements, CCC will refuse to execute that script and the associated task will report an error.

After copying scripts into CCC's Scripts folder or making changes to those scripts, you can choose "Secure CCC's Scripts folder" from CCC's Utilities menu to correct any ownership or permissions concerns. Please note that these additional security requirements are only applied to scripts stored within the /Library/Application Support/com.bombich.ccc/Scripts folder. If you prefer to manage the security of your shell scripts on your own, you may store them in another location.

Example pre and post clone shell scripts

To use any of these example scripts, download the script and place it somewhere on your startup disk. By default, CCC looks in /Library/Application Support/com.bombich.ccc/Scripts.

parallels_pause.sh
This is a pre clone script that you can use to pause all currently-running Parallels VM containers. This script will also retain state information that can be read by the corresponding parallels_start.sh post clone script to resume these VMs after the backup task has completed. Note: This script relies on command-line tools offered only in Parallels Desktop for Mac Pro or Business Edition. 

parallels_start.sh
This post clone script will resume any Parallels VM containers that were suspended by the parallels_pause.sh pre clone script. Note: This script relies on command-line tools offered only in Parallels Desktop for Mac Pro or Business Edition.

play_sound.sh
If you want to play a unique sound, use this script. You can plug in the path to any audio file of your liking or try one of the examples included.

eject_source_and_destination.sh
CCC's option to automatically unmount the destination volume is a volume-level task, not a device task. It's also limited to the destination. If you want to eject the destination device, or if you want to unmount or eject the source, use this post clone script instead. Note that ejecting a device will unmount all volumes on the device. Also note that this example script adds a 60-second delay to accommodate macOS's desire to automatically regenerate various cache files. This delay can be adjusted if necessary by editing the script.

pm_on_success.sh
This post clone script will perform the requested power management option (e.g. shutdown, restart, sleep) at the end of the backup task if the backup task completes without errors. Use this in lieu of one of the Power Management postflight options if you prefer the power management action does not occur when a task ends with errors (e.g. if the destination volume is missing).

quit_application.sh and open_application.sh
This pair of scripts can be used to quit and open an application before and after the backup task. Open these scripts in a text editor to define the application that should be quit or opened.

post_to_slack.sh
This postflight script will post the status of your backup task to a Slack channel.

ifttt_maker.sh
This postflight script will post an IFTTT Maker Event of the status of your backup task.

Using Carbon Copy Cloner to back up to/from another Macintosh on your network

$
0
0
Product: 
ccc5

Carbon Copy Cloner offers the option of securely copying your selected data to another Macintosh on your network (or anywhere on the Internet for that matter) via the Remote Macintosh... options in the Source and Destination selectors. After a brief setup procedure to establish trust between your Mac and the destination Mac, simply choose the source or destination volume/folder on the remote Mac and CCC will take care of the rest.

Before setting up CCC to back up to a remote Macintosh, you must:

  1. Confirm that the remote Macintosh is running a supported OS (OS X 10.7 or later)
  2. Enable Remote Login in the Sharing Preference Pane on the remote Macintosh
  3. Verify that any firewalls between the two Macs are permitting "secure shell" traffic over port 22 (or a custom port that you specify).

Enabling Remote Login on the remote Macintosh

To enable Remote Login on your remote Macintosh:

  1. Log in to that machine as an admin user.
  2. Open the System Preferences application.
  3. Open the Sharing Preference Pane.
  4. Check the box next to Remote Login.
  5. Be sure to allow access to All users, or explicitly add the Administrators group to the list of restricted users and groups.
  6. Make a note of your remote Mac's hostname. The hostname is indicated underneath the Computer Name text field. In the screenshot below, "Apollo.local" is the hostname of the remote Macintosh.
Enable Remote Login

Configuring a Remote Macintosh source or destination

With the Remote Login service enabled on the remote Mac, the next step is to choose Remote Macintosh... from CCC's Source or Destination selector. CCC will present a browser that lists any hosts on your local network that advertise the Remote Login service. Find and select your remote Mac in this list, then click the Connect button. If you do not see your Mac listed here, type in the hostname of your remote Mac, then click the Connect button. If the remote Mac is not on your local network, you may need to specify the IP address of the public-facing router that your Mac resides behind. Be sure to configure the router to forward port 22 traffic to the IP address that is assigned to the remote Mac.

Connect to host

Once CCC has established a connection to the remote Mac, you will be prompted to install a Mac-specific Public Key Authentication (PKA) key pair onto the remote Mac. You must provide the username and password of an admin user on the remote Mac to permit this, and that admin user must have a non-blank password. Those requirements are only for the initial public key installation. For future authentication requests, CCC will use the PKA key pair.

Note: This step establishes a high level of trust between the local and remote Mac; this is required to correctly preserve file ownership. The local Mac will have access to all data on the remote Mac, and administrative users on the remote Mac can gain access to the data that you back up to that Mac. Both Macs should be within your administrative control.


Authenticate to the remote Mac

Install Key

Once you have connected to the remote Mac and installed CCC's key on that system, CCC will present a volume browser. Select the volume or folder to use as the source or destination for your task. Note: avoid selecting a volume or folder that contains an apostrophe (').

Connect to host

Bandwidth management options

CCC offers two options that can help you address bandwidth concerns. The option to Compress data passed over the network can greatly reduce your backup time and total bandwidth used. The time savings depend on just how slow the connection is between the two Macs. If you have a connection that is slower than 10MB/s, compression will make the transfer faster. If your bandwidth is better than that, compression may actually slow down your transfer. CCC will not compress certain file types that are already compressed, such as graphics files, movies, and compressed archives. Specifying the option to compress data passed over the network does not create a proprietary or compressed backup; files are automatically decompressed on the destination volume on the remote Macintosh.

CCC also offers a bandwidth limitation option. If your ISP requires that your transfers stay below a certain rate, you can specify that rate here. Note that CCC errs on the conservative side with this rate, so the average transfer rate may be slightly lower than the limitation that you specify.

De-authenticating a remote Macintosh

If you no longer wish to use a particular remote Macintosh, you can click the Deauthenticate... button to remove CCC's PKA key pair from the remote Mac.

Remote Macintosh prerequisites

At this time, CCC requires the use of the root account (though it does not have to be enabled) on both the source and destination Macs. To successfully back up to a remote Macintosh, you must have administrative privileges on both machines.

CCC also requires that the remote Macintosh be running macOS 10.7 or later. Non-Macintosh systems are not supported with the Remote Macintosh feature.

Note for Yosemite, El Capitan, & Sierra users: If your source contains macOS Yosemite (or later) system files, the Remote Macintosh must be running macOS 10.9.5 or later. If the Remote Macintosh is not running 10.9.5 or later and you attempt to back up macOS Yosemite (or later) system files, the backup task will report numerous "Input/output" ("Media") errors. Filesystem changes introduced on Yosemite cannot be accommodated by older OSes. Apple added support for those filesystem changes in 10.9.5 to offer a modest amount of backwards compatibility.

Additional pointers for advanced users

Carbon Copy Cloner's public key-based authentication is designed to work with no additional configuration of the services required for backing up over a network connection. CCC uses rsync over an ssh tunnel to perform the backup. If you do make modifications to the sshd configuration, you should consider how that may affect your backup. For example, CCC requires use of the root account over ssh. If you set the "PermitRootLogin" key in the sshd_config file to "no", you will not be able to use CCC to or from that machine. It's an important distinction to note that the root account does not have to be enabled, but sshd must permit the use of the root account. The "PubkeyAuthentication" key must also not be set to "no", because Public Key Authentication is required for CCC to authenticate to the remote Mac. CCC will attempt to proactively present these configuration scenarios to you if authentication problems are encountered.

Additionally, the initial Public Key Authentication (PKA) setup requires the use of an admin user on the remote Macintosh. That admin user account must have a non-blank password, and the Remote Login service must permit password-based authentication. These requirements apply only to the initial installation of CCC's PKA credentials. Once CCC has installed these credentials on the remote Mac, CCC will use PKA for authentication to the remote Mac.

Troubleshooting connectivity problems to a remote Macintosh

Problems connecting to a remote Macintosh generally are caused by configuration problems with the Remote Login service on the remote Macintosh. Try the following if you are having trouble making a backup to a remote Mac:

  1. Verify that the Remote Login service is enabled in the Sharing preference pane on the Remote Macintosh.
  2. Verify that access to the Remote Login service is allowed for All users.
  3. Re-select Remote Macintosh from CCC's Source or Destination selector and verify that authentication to the remote Mac is configured.
  4. Verify that your firewall and the remote Mac's firewall permits traffic on port 22. If you have an application firewall in place (e.g. Little Snitch), verify that access is granted to CCC's privileged helper tool, "com.bombich.ccchelper".
  5. If your local Mac and remote Mac are not on the same network (e.g. you're connecting across a VPN or through a router and over the Internet), confirm that a connection can be established between the two Macs. How you do this will vary from one scenario to the next, but you can generally verify connectivity by typing "ssh root@192.168.1.1" into the Terminal application (replace 192.168.1.1 with the hostname or IP address of your remote Mac). If you see a request for a password, then connectivity is established. If not, your network configuration isn't permitting the traffic, or the hostname that you're connecting to is invalid or unavailable. If you are accessing a remote Mac that is behind a router, consult the router's port forwarding documentation and verify that port 22 traffic is directed to the internal IP address of the remote Mac.

VPN and port forwarding configuration is outside of the scope of support for CCC, though our support staff will make every effort to identify whether problems are occurring within that configuration or within the service configuration on your remote Mac. If you have worked through the troubleshooting steps above and are still having trouble backing up to a remote Macintosh, please choose Report a problem from CCC's Help menu and submit a support request.

Meraki router intercepts Secure Shell traffic

Some users that have a Meraki router involved in their configuration have reported that its default configuration will interrupt Secure Shell traffic. The firewall rule that causes interference is in place to protect the network from vulnerabilities that are irrelevant between two modern Macs. Nonetheless, the firewall intercepts traffic after initially allowing a connection, which is presented by CCC as a "lost connection" or a failure to authenticate to the remote Mac. The following steps correct the Meraki configuration concern:

  1. Log into the Meraki as an administrative user and open the "Security report"
  2. Filter the log for SSH events
  3. Click the "SSH_EVENT_REPOVERFLOW" event from the list to open it and review the blocked event
  4. To allow the blocked traffic of this type, click "Yes" to add this event to the whitelist.

Thomson Gateway router intercepts Secure Shell traffic

Similar to the problem described above for Meraki router, the Thomson Gateway router can also cause interference that appears as an authentication failure. Forwarding traffic to a non-standard secure shell port (e.g. 2222, then be sure to specify that port when connecting to the Remote Macintosh in CCC) resolves the problem.

A note about access privileges to backed up data

While logged in to your remote Macintosh, you may not have permission to view the contents of your backup in the Finder. Your access to the files will be based on the unique id that is associated with the user account that you're logged in to on the remote Macintosh and the one associated with the account(s) on the other Mac(s) that you're backing up. The first administrator account always gets a uid of "501", and subsequent accounts are assigned incrementally higher uids — 502, 503, etc. For security and privacy purposes, macOS restricts access to the contents of user home directories to the owners of those home directories, and these restrictions are preserved when your data is backed up to a remote Macintosh.

To learn what user id is associated with your account:

  1. Open System Preferences and click on the User Accounts preference pane.
  2. Click on the lock and authenticate.
  3. Control+click on your account in the accounts table and choose "Advanced options".

You will see your User ID in the panel that appears.

This may be annoying from the perspective of trying to access those files on your remote Macintosh, but it is important for CCC to preserve the ownership and permissions information when backing up your data. If/when you want to do a restore, you could do either of the following:

a) Attach the external drive directly to the machine that you want to restore files to — the accounts on those systems will be able to access their backed up files.

b) Do a restore directly within CCC from the original source Macintosh.

If you must have read access to some of this data (e.g. the original Mac is gone, the user account changed, etc.), you can change the ownership of the home folder and its contents in the Finder:

  1. Choose Get Info from Finder's File menu.
  2. In the Sharing and Permissions section at the bottom, click on the lock icon to make the permissions editable.
  3. Click on the + button.
  4. In the window that appears, select your account, then click the Select button.
  5. Set the access privileges to Read & Write.
  6. Click on the Gear menu and choose to apply the change to enclosed items.

Making bootable backups on remote Macs

If you are attempting to create a bootable backup of your Mac, you should attach the backup disk directly to your local Mac for an initial backup task. After verifying that the backup volume is bootable, you can then attach that disk to a remote Macintosh and proceed with regular backups. You should also repeat the local backup any time you apply major operating system upgrades so that any helper partitions on the backup disk can be updated accordingly.

Catalina users: Starting with macOS Catalina, creating bootable backups on a remote Macintosh is no longer practical — CCC can only perform the myriad of partitioning tasks that are required by Catalina on a locally-attached device. Therefore, copying system files to a remote Macintosh is not supported on systems running Catalina or later. If you select a Catalina startup disk as the source for a backup task and a remote Macintosh destination, CCC will automatically exclude system files from the backup task. When selecting a destination on the remote Mac for this sort of backup, choose the "Data" volume that is associated with your backup destination, e.g. "CCC Backup - Data" (NOT the volume named just "Data"; that is your remote Mac's startup disk Data volume!).

Likewise, CCC will not allow the selection of a Catalina+ System volume on a remote Mac as the source for a backup task. Instead, choose the "Data" volume on the remote Mac to back up the user data portion of the startup disk. This backup will not be bootable, but it can be used as a source to the Migration Assistant application.

Related Documentation


Excluding files and folders from a backup task

$
0
0
Product: 
ccc5

By default, CCC will copy everything from the volume or folder that you specify as the source. If you do not want to copy every item from the source, you can define a task filter to limit what items will be copied. Choose Copy Some Files from the popup menu underneath the Source selector, or click on the Task Filter button (Task Filter button icon) to open the Task Filters panel.

Default Filter Behavior

The CCC task filter offers two paradigms for defining the task filter. The task filter can either include everything by default or the filter can exclude everything by default. Which behavior you choose depends on what you want CCC to do with new items that are added to the source. You can change the default filter behavior by clicking the button in the top-right corner of the Task Filter window:

Include everything by default: Define what is excluded

CCC's default behavior is to include everything by default. In this mode you define what is excluded from the backup task by unchecking the box next to an item in the file list. This mode is simplest for users that only want to exclude a handful of items, but generally back up everything because you don't have to revisit the task filter to indicate that new items should be included in the backup task. If you add a file or folder to the source (e.g. in the future after defining your task filter), and that item is not in a folder that you have excluded from the backup task, that item will automatically be included in the backup task.

Exclude everything by default: Define what is included

In this mode, everything is excluded by default, and you define what is included in the backup task by checking the box next to an item in the file list. If you add an item to the source in the future, and that item is not in a folder that is specifically included by the task filter, that item will not be backed up. This mode is helpful in cases where you only want to back up a handful of items on a volume whose subfolders frequently change.

Calculating disk usage and Protected Size

You can right-click on any folder and choose Refresh size to have CCC enumerate the contents of that folder and evaluate the task filter against its contents. CCC will report the total size of the folder and the protected size of the folder (i.e. how much data is included in the backup task). You can also click on the Refresh Disk Usage button (
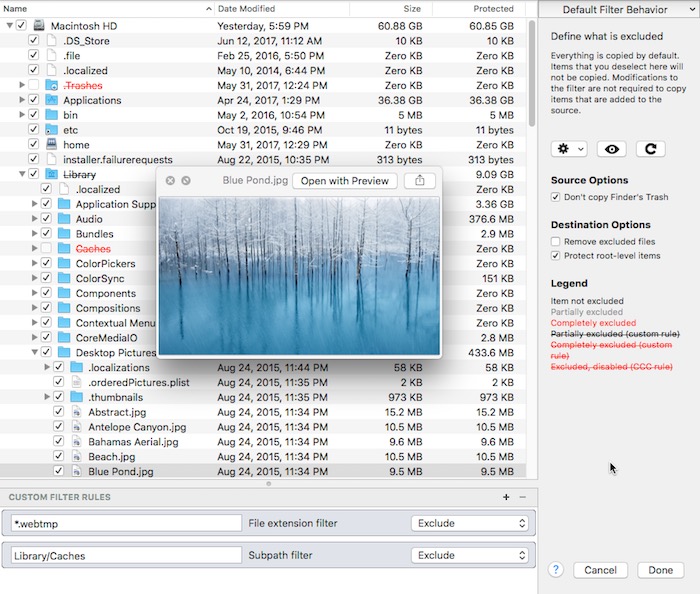
) to enumerate the contents of the entire source. This could take a while, especially for network volumes, so consider refreshing the disk usage of individual folders instead. If CCC is in the midst of enumerating a folder, you can right-click on that folder to stop enumeration, or click again on the Refresh Disk Usage button to stop the calculation.

Source and destination options

Finder's Trash is excluded by default

By default, CCC won't copy the contents of the Finder Trash because, well, it's Trash. If you want CCC to back up your Trash, open the Task Filter window, then uncheck the Don't copy Finder's Trash box to remove the exclusion. See this section of CCC's documentation to learn more about the idiosyncrasies of the Finder Trash mechanism and how it relates to backing up and restoring the content of the Trash.

Excluded files are not deleted from the destination

When you exclude an item from the CCC backup task, this tells CCC, "Do not copy that item". That does not, however, indicate that CCC should delete that item from the destination, e.g. if it had been copied there by a previous backup task. In fact, excluding an item from the backup task implicitly protects that item on the destination. If you have items on the destination that are now excluded from a backup task that you no longer want to retain on the destination, you can simply remove them from the destination by dragging them to the Trash. If you would like CCC to facilitate that cleanup, check the Remove excluded files checkbox.

This option is ignored if your task is configured with the Don't delete anything SafetyNet setting. This setting also will not override CCC's explicit protections placed on the _CCC SafetyNet folder, so when this option is used in conjunction with CCC's "SafetyNet On" setting, items will be moved to the SafetyNet folder rather than deleted immediately.

Please carefully consider the scope of effect that this option will have when using the Exclude everything by default filter behavior.

The Protect root level items setting is described in more detail in the Advanced Settings article.

Custom Filters

If the files you want to match are scattered across your filesystem, it may be tedious to manually locate each of them and create conventional rules (i.e. check or uncheck the item in the file list). To address this, CCC offers custom filter options in which you define a filter rule using an expression. Choose Show custom filters from the gear menu to reveal the custom filters table.

To add a custom filter rule, click the + button in the custom rules table header, or drag a file or folder from the file list into the custom filters table to add that item as a template. To reorder custom filters, simply drag and drop the items in the custom filters table. Custom filter rules will be evaluated by the task filter before conventional filter rules.

Anchored path filter

An anchored path filter defines a rule using an absolute path relative to the root of the source. /Library/Caches, for example, is an anchored path filter because it starts with a "/". This filter would match /Library/Caches, but would not match /Users/someuser/Library/Caches. You can also include wildcards in the expression, e.g. /Users/*/Library/Caches would match the Library/Caches folder in each user home folder.

Subpath filter

A subpath filter defines a rule using a partial path or filename that does not start with "/". Continuing the example above, Library/Caches would match /Library/Caches and  /Users/someuser/Library/Caches. Wildcards are accepted in the expression; to match a particular file type, use an expression like *.mov to match all .mov files.

Wildcard characters

Wildcard characters can be added to an expression to match a wider range of files and folders. * will match one or more characters in any single file or folder name, e.g. *.mov will match all movie files.

/**/ will match one or more path components, e.g. /Users/**/*.jpg will match any JPEG photos in any user home folders, but won't match JPEG photos elsewhere, e.g. those in /Library/Desktop Pictures. You would also use the ** wildcard when defining an inclusion rule that should copy all items within a particular folder and its subfolders. For example, /Users/yourname/Documents would include only that folder itself, not any of its contents. /Users/yourname/Documents/** would include the Documents folder, all of its contents, and the contents of every subfolder within it.

If you specify additional path components after a ** wildcard, then that wildcard is only applicable up to a match against the path component that follows the wildcard. For example, the exclusion rule /Data/**/Marine/Invertebrates would exclude /Data/2018/Marine/Invertebrates, but it would not exclude /Data/2018/Marine/Benthic/Marine/Invertebrates. In the latter case, **/Marine matches 2018/Marine, but then the the next path component fails to match (and we are deliberately choosing to not allow the ** wildcard to match 2018/Marine/Benthic in this case).

? can be used to match any single character, e.g. *.mp? will match both .mp3 and .mp4 files. Use the ? wildcard sparingly, it will greatly increase the amount of time required to evaluate the task filter.

Expert settings

Custom filter rules are usually applied to include or exclude an item. Exclusions, however, are actually composed of two behaviors: a matching item on the source will not be copied (Hide the item from the copier), and a matching item on the destination will be protected (Protect the item from the copier). Likewise, Inclusions indicate that a matching item on the source will be copied (Show the item to the copier) and a matching item on the destination may be deleted (Risk the item). Occasionally it's helpful to define a rule that affects only matching items on the source or only on matching items on the destination. For example, if you have a folder named "Archives" on the destination that does not exist on the source, that item won't appear in the source list so it cannot be excluded (and thus protected) in the conventional manner. You could add an /ArchivesProtect rule to explicitly protect that item on the destination.

Special considerations for the 'Exclude everything by default' filter behavior and custom rules

Normally the 'Exclude everything by default' filter behavior will ignore any folders on the source that are not explicitly included by your task filter. That 'ignore' behavior imparts explicit protection on those items as well — if those items are present on the destination, CCC will leave them alone. When you add a custom filter to your task, however, CCC must perform a complete scan of the source to find items that match your custom rules. As it does that, CCC must collect a list of all folders on the source. At the end of the scan, many of these folders may be empty. To avoid creating these empty folders on the destination, CCC removes all empty folders from its "list of items to consider". That has the side effect, however, of removing any protection that would be afforded to implicitly excluded folders. Therefore, if you configure a filter to exclude everything by default and add a custom rule to that filter, you should expect CCC to remove any folder on the destination that has no items matching your custom rules. You can avoid that behavior by choosing the 'Don't Delete anything" SafetyNet setting.

Including folders and their content with the 'Exclude everything by default' filter behavior and custom rules

Including a folder or a bundle file and its contents via a custom rule requires a non-intuitive expression, because the filter rule must match multiple path components. To include a folder and all of its contents, add ** to the end of the filter expression. For example, to include the Photos Library from your home directory, the following expression would apply as an inclusion rule:

/Users/johnny/Pictures/Photos Library.photolibrary**

Exporting and Importing filters

A whole task filter can be imported or exported via the gear menu. When importing a filter, the current filter will be replaced with the filter you're importing. CCC will automatically purge conventional rules from the filter if they are not applicable to the currently-selected source. For example, f you had excluded /Applications in the filter, but /Applications does not exist on the current source, that rule will be removed from the filter to avoid unexpected results should an /Applications folder ever be added to the source. This purging is not applicable to custom filter rules.

You can also export individual or groups of custom filter rules. Select the rule(s), then simply drag the items onto your Desktop. To import custom rules from a file exported in this manner, simply drag the file into the custom filter rules table.

Items automatically excluded

Carbon Copy Cloner excludes some items from the backup task by default. A complete list of exclusions along with an explanation for the exclusion is available in this section of the documentation. If you would like to visualize the items that are automatically excluded, hold down the Option key while clicking on the Task Filter button to open the Task Filters window.

The CCC SafetyNet folder, "_CCC SafetyNet" is excluded by a global filter. See the Frequently asked questions about the Carbon Copy Cloner SafetyNet section of the documentation to learn how to restore items from that folder.

Additionally, CCC will exclude and protect system folders if you select the startup disk or a non-HFS+/APFS formatted volume as the destination. If you would like to restore a specific item, such as the contents of /Library/Application Support, this protection can be avoided by choosing a specific folder at the source and destination via the Choose a folder options in the Source and Destination selectors. With great power comes great responsibility — take care to avoid overwriting your system files.

Related documentation

Frequently asked questions about the Carbon Copy Cloner SafetyNet folder

$
0
0
Product: 
ccc5

Note: The topics in this article are not relevant to APFS-formatted destination volumes that have CCC snapshot support enabled. For those volumes, CCC leverages snapshots to implement the SafetyNet functionality, and the snapshots aren't affected by any of the shortcomings described here.

How do I restore files from the _CCC SafetyNet folder?

CCC's SafetyNet folder ("_CCC SafetyNet") is excluded from CCC's backup tasks by default because it contains older versions of modified files, and files that were deleted from the source volume. Typically when you restore data from your backup volume, you will want to avoid restoring the items in this folder, choosing instead to restore the most recent backup of your files.

If there is something that you would like to restore from the CCC SafetyNet folder, a drag and drop restore in the Finder is usually the easiest way to do so. If you would like to restore many items, or merge them into an existing folder, choose Choose a folder... from CCC's Source selector and choose the folder from which you would like to restore. If you choose the _CCC SafetyNet folder as the source, note that the full path to your archived files will be preserved, e.g. 2017-07-27 (July 27) 14-11-18/Users/fred/Documents/some file.pdf. In most cases, you will want to choose a subfolder within the archives folder as your source. Likewise, choose Choose a folder... from CCC's Destination selector and select the specific folder that you want to restore items into.

Why can't I open some files in the _CCC SafetyNet folder?

When CCC evaluates the items on your destination and determines whether they should be archived or left in place, it does so on a file-by-file basis. This poses a challenge for bundle files — files that are actually a folder of files, but presented by the Finder as a single file. As a result, bundle files (e.g. applications, some types of libraries, some custom file types) may appear in an incomplete form within the CCC SafetyNet folder.

Unless all of the components within a bundle file are modified, only the items that have been updated will be present. Incomplete bundle files are generally not useful on their own, but their contents can be. For example, if you accidentally deleted a photo from your iPhoto library, you would be able to recover that lost photo from the archived iPhoto library bundle. To reveal the content of an incomplete bundle file in a CCC SafetyNet folder, right-click (or Control+click) on the item and choose Show package contents from the contextual menu.

Can I restore a previous version of the OS using one of the archives in the _CCC SafetyNet folder?

While it is possible to recover an older, complete version of a bundle file from the CCC SafetyNet folder and complete backup (e.g. by overlaying the incomplete archived bundle file on top of the current backup of the bundle file), this is generally too tedious of a task to be practical for application and OS restores. CCC's SafetyNet folder is not intended to offer a method for rolling back software updates, OS restores should always be done from the complete backup at the root level of your destination, or from a snapshot.

I deleted files from my startup disk to make more room, but now it's hard to find some of those files on my backup volume

This generally isn't a concern for ordinary "flat" file types, but it it can be a concern for certain applications that store lots of files in a single, monolithic-appearing container file. Some applications offer highly customized interfaces to access a specific file type. Photos, for example, allows you to manage tens of thousands of photo files. These files are all stored in a proprietary bundle file in your home folder, but because photos are so easy to organize within Photos, many people don't consider how those files are organized on the hard drive. Usually you really don't have to either. That is, of course, until you can no longer use Photos to access your photo files, and that's exactly what happens when you delete files from your Photos library, abandoning them to the SafetyNet folder on your backup volume.

If you have a habit of periodically deleting photos, music, or movies from Photos, iTunes, Aperture, or any other application that uses a proprietary bundle file format so that you can "free up some space on your startup disk", consider how those files will be organized on the destination. Specifically, keep in mind that you use a very elaborate application to access these files on the source volume, but you will only have the Finder to access these files on the backup volume.

CCC can't reorganize your deleted files in a way that's logical to you, it can only place them at the same path in the _CCC SafetyNet folder as they were on the source volume. For files buried in a bundle file on the source (as is the case for Photos, for example), this means that the files will be buried in bundle files in various time-stamped archive folders on the destination. These files will also be subject to deletion if you configure CCC to periodically prune the contents of the SafetyNet. In short, simply archiving deleted files from applications such as these isn't going to be the best way to store these items long-term if your goal is ultimately to keep them.

When you want to free up some space on your startup disk, consider this approach instead, using Photos as an example:

  1. Create a new folder at the root level of your backup volume, named something like "Archived Photos 2016".
  2. In Photos, delete all of the photos that you want to remove from your source volume. When you delete these items, they are placed in the Recently Deleted album.
  3. Click on the Recently Deleted album in the Photos sidebar and select all of the photos in that folder.
  4. Drag all of the selected photos from the Recently Deleted album to the "Archived Photos 2016" folder on the backup volume.
  5. Once the photos are safely copied to and neatly organized on the backup volume (and ideally, after you have made a second backup of these precious files on some other volume), go ahead and click the Delete All button in the Recently Deleted album.

Not all applications have this kind of internal Trash folder, so be sure to see how it works for other applications before applying these exact steps. The general idea, though, is that you should deliberately archive the items that you're removing from your source volume in a way that makes sense to you rather than passively allowing CCC to archive them in a manner that makes sense to the computer.

Why can't I delete some items from the SafetyNet folder? The Finder says that some items are in use.

In OS X El Capitan, Apple introduced a new feature called System Integrity Protection (SIP). SIP works by preventing any user from deleting certain protected system items on the startup disk. If you boot your Mac from a backup volume and restore system files to your startup disk, CCC will place outdated versions of those system files into the SafetyNet folder. These modifications are allowed because CCC is making changes to that volume while it is not the current startup disk. When you restart your computer from that destination volume, however, SIP re-engages and may then prevent you from deleting the protected items that were placed into the SafetyNet folder. If you attempt to delete these items, the Finder will report that they cannot be deleted because they are in use, or because they are protected. If you try to delete these items in the Terminal application, you'll get a more distinct error message, "Operation not permitted".

CCC won't have any trouble pruning the SafetyNet folder on its own during ordinary backup tasks. If you would like to remove an item from the SafetyNet manually, however, or if you would like to remove the entire folder:

  1. Choose Delete a SafetyNet folder from CCC's Utilities menu
  2. Drag the folder you want to delete onto the window that is presented. Alternatively, you can click on the drop zone in the window that is presented to make your selection from a navigation panel.
Delete a SafetyNet folder

If the item you're trying to remove is on your current startup disk, CCC will move the item to the root of your startup disk, then instruct you to boot your Mac from some other volume (e.g. your backup disk). Once booted from the backup volume, you can repeat the same steps with CCC to remove the SafetyNet folder.

If you're still having trouble after trying that, don't hesitate to ask us for help.

How can I prevent Migration Assistant from copying the CCC SafetyNet folder during a migration?

If your backup volume has a "_CCC SafetyNet" folder, you can move that folder to the Trash before using Migration Assistant to avoid copying that folder during a migration. This is particularly important if that folder has a lot of data in it and you're migrating to a disk that is smaller than the backup volume. If you would like to retain the SafetyNet folder on the backup volume, don't empty the Trash. After Migration Assistant has completed, then you can move the SafetyNet folder back to the root of the backup volume.

"My disk is already formatted APFS or HFS+, why am I getting this warning?"

$
0
0
Product: 
ccc5

If your disk is not partitioned using the scheme recommended and supported by Apple, CCC will indicate a warning when you start the backup task such as:

"You may have difficulty booting from this destination volume, the underlying disk is not partitioned with a partitioning scheme that Apple recommends for Intel Macs.", or when CCC attempts to convert the destination to APFS after installing macOS 10.15 Catalina, CCC may be unable to convert the volume from HFS+.

How your destination volume is formatted is not actually relevant to this warning. The problem is not a matter of how your destination volume is formatted, rather it is a matter of how the disk is partitioned. The following graphic explains the relationship between a disk and a volume:

Every disk has exactly one partition scheme. A disk can be partitioned as "Apple Partition Map" (APM), "GUID Partition Table" (GPT), "Master Boot Record" (MBR), or the Fdisk partition scheme. PowerPC Macs could only boot from a disk that is partitioned with the APM partitioning scheme. Intel Macs can boot from a disk that is partitioned with either the APM or GPT partitioning scheme. Note, however, that Apple only supports booting an Intel Mac from a disk partitioned with the GPT partitioning scheme. Because Apple no longer supports the APM partitioning scheme, CCC will warn you if your destination disk is not partitioned with the GPT partitioning scheme. As the warning indicates, you may have difficulty booting from the destination volume, but it may work just fine. We expect that Intel Macs will eventually drop support for booting from APM-partitioned disks.

Apple's New APFS format can only reside on a "GUID Partition Table" (GPT) partition scheme so if your destination is not using GPT, CCC will be unable to convert an HFS+ volume to the volume to APFS as required by  macOS 10.15 Catalina and the backup will fail with a warning about the partition scheme. 

Here's what you need to do about the warning

If you haven't copied any data to the destination disk, then take the time to repartition your disk using the GPT partitioning scheme (see above) so you have a sanctioned, bootable backup volume.

If you cannot repartition the disk because you already have a considerable amount of data on the disk, and are using macOS 10.14 Mojave or earlier, proceed with the backup task, but confirm whether it can actually boot your Mac. If it can, you're all set and you shouldn't be bothered by the warning again. If you cannot, you will have to back up the other data on your destination disk and repartition the disk using the GPT partitioning scheme to get a bootable backup.

If you are running macOS 10.15 Catalina, or newer, the volume must be repartitioned.

Configuring Scheduled Task Runtime Conditions

$
0
0
Product: 
ccc5

Sometimes time-based scheduling is insufficient to describe exactly how you want your tasks to run. CCC offers runtime conditions which allow you to restrict the running of your tasks under certain conditions when the task is normally scheduled to run.

Defer if another task is writing to the same destination

If you have more than one scheduled task that writes to the same destination volume, you may want to configure the tasks to wait for one another such that only one task is writing to the volume at a time. When you configure a task with this setting and the scheduled run time elapses, CCC will place the task into a queue for deferred execution if another task is already writing to that same destination. Assuming another run time condition does not prevent it, CCC will run the deferred task as soon as the first task finishes writing to the shared destination volume.

Limit which days of the week this task can run

This option allows you to limit a task to running only during weekdays or only during weekend days. This option is not applicable to the "weekly" and "monthly" scheduling settings.

Limit when this task can run

This option allows you to limit a task to running during specific hours of the day. For example, if you don't want your hourly task to run in the afternoons, you could set a start limit of 6PM and an end limit of 12PM. This limit would allow the task to start any time after 6PM and any time up to 12PM, thus preventing the task from running between 12PM and 6PM. If the task is already running (e.g. if it started at 11:55AM), CCC will stop the task if it is still running when the end limit is reached.

Note: Set the task start time before you attempt to set time limits. CCC will not allow you to specify a time limit that does not contain the current start time of the task.

Handling system sleep events

By default, CCC will wake your computer when your tasks are scheduled to run. You can change this setting in the Runtime Conditions section of the Scheduler popover. There are four options:

Wake the system

CCC will configure a wake event to wake the system shortly before the task runs, so the task should run on schedule. If the system is turned off, this wake event will not turn on the system.

Wake or power on the system

CCC will configure a wake or power on event to wake the system or turn it on shortly before the task runs, so the task should run on schedule.

Run this task when the system next wakes

Upon a wake notification, CCC will run the backup task if its scheduled run time has passed. The task will not run exactly when it is scheduled, though CCC can run tasks during macOS Dark Wake events (aka PowerNap, aka Maintenance Wake), which occur every couple hours. If you want your backup tasks to run in the middle of the night without turning on your display, this is the right option for you.

Skip this task

CCC will run the task only at its scheduled run time if the system is awake at that time. Upon a wake event, CCC will not run a backup task if the scheduled run time has passed.

Don't send error notifications

By default, CCC will report an error if the source or destination volume is unavailable when the task is scheduled to run. By enabling this option, CCC will suppress these errors. Additionally, if you have configured your task to send an email when errors occur, this option will suppress that email.

This option is not applicable for the When the source or destination is reconnected scheduling setting, because a task configured in that manner will only attempt to run if both the source and destination are present.

Run this task as soon as the missing volume reappears

If a backup task is missed because the source or destination was missing at the scheduled run time, this option will cause CCC to run the backup task as soon as that missing volume reappears.

Related Documentation

Some files and folders are automatically excluded from a backup task

$
0
0
Product: 
ccc5

Carbon Copy Cloner maintains a list of certain files and folders that are automatically excluded from a backup task. The contents of this list were determined based on Apple recommendations and years of experience. The following is a list of the items that are excluded along with an explanation of why they are excluded.

Legend:
Items prefixed with a "/" indicate that they will only be ignored if located at the root of the volume.
Items postfixed with a "/*" indicate that only the contents of those folders are ignored, the folders themselves will be copied.
Items postfixed with a "*" indicate that the filename will be matched up to the asterisk.

Filesystem implementation details

  • .HFS+ Private Directory Data*
  • /.journal
  • /.journal_info_block
  • .afpDeleted*
  • ._*
  • .AppleDouble
  • .AppleDB
  • /lost+found
  • Network Trash Folder
  • .TemporaryItems

These items only show up if you're running an older OS than what was used to format the source volume, and on some third-party implementations of AFP and SMB network filesystems. These items should never, ever be manipulated by third-party programs.

Volume-specific preferences

  • .metadata_never_index
  • .metadata_never_index_unless_rootfs
  • /.com.apple.timemachine.donotpresent
  • .VolumeIcon.icns
  • /System/Library/CoreServices/.disk_label*
  • /TheVolumeSettingsFolder

These items record volume-specific preferences, e.g. for Spotlight, Time Machine, and a custom icon for the volume. Feedback on the exclusion of these items is welcome. Because they are volume-specific preferences, the exclusion of these items from a day-to-day backup seems most appropriate.

Apple-proprietary data stores

  • .DocumentRevisions-V100*
  • .Spotlight-V100
  • /.fseventsd
  • /.hotfiles.btree
  • /private/var/db/systemstats

These items are Apple-proprietary data stores that get regenerated when absent. Attempting to copy these data stores without unmounting the source and destination is not only futile, it will likely corrupt them (and their respective apps will reject them and recreate them).

The DocumentRevisions data store is used by the Versions feature in macOS. The Versions database stored in this folder contains references to the inode of each file that is under version control. File inodes are volume-specific, so this dataset will have no relevance on a cloned volume.

Volume-specific cache files

  • /private/var/db/dyld/dyld_*
  • /System/Library/Caches/com.apple.bootstamps/*
  • /System/Library/Caches/com.apple.corestorage/*

Copying these caches to a new volume will render that volume unbootable. The caches must be regenerated on the new volume as the on-disk location of system files and applications will have changed. macOS automatically regenerates the contents of these folders when CCC is finished updating the backup volume.

NetBoot local data store

  • /.com.apple.NetBootX

In the unlikely event that your Macintosh is booted from a Network device, macOS will store local modifications to the filesystem in this folder. These local modifications are not stored in a restorable format, therefore should not be backed up. In general, you should not attempt to back up a NetBooted Mac.

Dynamically-generated devices

  • /Volumes/*
  • /dev/*
  • /automount
  • /Network
  • /.vol/*
  • /net

These items represent special types of folders on macOS. These should not be backed up, they are dynamically created every time you start the machine.

Quota real-time data files

  • /.quota.user
  • /.quota.group

When these files are copied to a destination volume using an atomic file copying procedure, the macOS kernel will prevent the destination from being gracefully unmounted. The contents of these files is never accurate for the destination volume, so given the kernel's unruly behavior with copies of these files, CCC excludes them. According to the quotacheck man page, these files should be regenerated every time a quota-enabled volume is mounted (e.g. on startup). We have not found that to be consistently true. If you're using quotas, run sudo quotacheck / after restarting from your backup volume or a restored replacement disk to regenerate these files.

Large datastores that are (or should be) erased on startup

  • /private/var/vm/*
  • /private/tmp/*
  • /cores
  • /macOS Install Data

macOS stores virtual memory files and your hibernation image (i.e. the contents of RAM are written to disk prior to sleeping) and temporary items in these folders. Depending on how you use macOS and your hardware configuration, this could be more than 50GB of data, and all of it changes from one hour to the next. Having this data for a full-disk restore does you absolutely no good — it makes the backup and restore processes take longer and the files get deleted the next time you boot macOS.

Trash

  • .Trash
  • .Trashes

Moving an item to the trash is typically considered to be an indication that you are no longer interested in retaining that item. If you don't want CCC to exclude the contents of the Trash, you can modify each task's filter:

  1. Choose Copy Some Files from the popup menu underneath the Source selector
  2. Click the Inspector button adjacent to that same popup menu to reveal the Task Filter window
  3. Uncheck the box next to Don't copy the Finder's Trash
  4. Click the Done button

Time Machine backups

These folders store Time Machine backups. Time Machine uses proprietary filesystem devices that Apple explicitly discourages third-party developers from using. Additionally, Apple does not support using a cloned Time Machine volume and recommends instead that you start a new Time Machine backup on the new disk.

  • /Backups.backupdb
  • /.MobileBackups
  • /.MobileBackups.trash
  • /private/var/db/com.apple.backupd.backupVerification

Corrupted iCloud Local Storage

iCloud leverages folders in your home directory for local, offline storage. When corruption occurs within these local data stores, macOS moves/renames the corrupted items into the folders indicated below. macOS doesn't report these corrupted items to you, nor does it attempt to remove them. CCC can't copy the corrupted items, because they're corrupted. To avoid the errors that would occur when trying to copy these corrupted items, CCC excludes the following items from every backup task:

  • Library/Mobile Documents.*
  • .webtmp

Special files

Files included in this section are application-specific files that have demonstrated unique behavior. The kacta and kactd files, for example, are created by antivirus software and placed into a special type of sandbox that makes them unreadable by any application other than the antivirus software.

The "com.apple.loginwindow" item can be found in each user home folder. Excluding this item prevents the applications that were open during the backup task from opening when you boot from the backup volume. This seems appropriate considering that Apple intends the feature to be used to open the applications that were in use when you log out, restart or shutdown, not at an arbitrary point during the backup task.

  • /private/tmp/kacta.txt
  • /private/tmp/kactd.txt
  • /private/var/audit/*.crash_recovery
  • /private/var/audit/current
  • /Library/Caches/CrashPlan
  • /PGPWDE01
  • /PGPWDE02
  • /.bzvol
  • /.cleverfiles
  • /Library/Application Support/Comodo/AntiVirus/Quarantine
  • /private/var/spool/qmaster
  • $Recycle.Bin
  • Library/Preferences/ByHost/com.apple.loginwindow*
  • .dropbox.cache
  • /private/var/db/atpstatdb*

CCC SafetyNet folders

When CCC's SafetyNet feature is enabled, CCC creates a _CCC SafetyNet folder at the root of the selected destination volume or folder. When CCC encounters an item on the destination that does not exist on the source, or an item that will be replaced with an updated item from the source, that item gets placed into the SafetyNet folder rather than being deleted immediately. The SafetyNet folder is literally a safety net for files on your destination. If you accidentally delete a file from the source and you don't realize it until after your backup task runs, you'll find the item in the SafetyNet folder. Likewise, if you accidentally specify the wrong volume as a destination to a CCC backup task, the mistake does not catastrophically delete every file from the selected destination; you simply recover the items from the _CCC SafetyNet folder.

The protection that the SafetyNet folder imparts is specific to the volume upon which the SafetyNet folder resides. As such, CCC never includes the contents of the _CCC SafetyNet folder in a backup task. So, for example, if your hard drive fails and you restore your backup to a replacement disk, the _CCC SafetyNet folder is automatically excluded from that restore task. If you have several tasks backing up to separate folders on a backup volume, for example, the _CCC SafetyNet folders that are created in those subfolders would not be included in a secondary backup task that copies your backup disk to a third disk.

Viewing all 257 articles
Browse latest View live


Latest Images